Feeds:
Posts
Comments

Apple Cider Pudding

Ramekin of pale peach-colored Apple Cider Pudding with a spoonful removed.

This past week, I became obsessed with Smitten Kitchen’s luxe butterscotch pudding recipe. It’s got eggs, cream, butter, and a deep caramel flavor. What’s not to love? I made it for my two kids and they went wild. I’d also been eyeing Smitten’s apple cider caramels recipe and thinking of my own bacon caramels, and imagining doing a mashup. While licking a last spoonful, my daughter declared that she wanted apple pudding next and I had a brilliant idea. Instead of making caramels that I would feel guilty having around the house, I would turn that apple cider into the butterscotch for the luxe butterscotch pudding. With the eggs and dairy, it’s almost a meal, so I’m not a horribly irresponsible parent for letting them have as much as they want, I tell myself.

Well, it came out far better than I imagined. The apple flavor is so intense and tart. The creamy custard silkily complements the whole thing. I let me daughter scrape the cooled down pot clean and she looked like some kind of rabid creature when we tried to take it away. If that’s not an endorsement, I don’t know what is.

Recipe: Apple Cider Pudding

Makes 6 servings

  • 6 cups apple cider
  • 3 tbs cornstarch
  • 2 egg yolks
  • 1 whole egg
  • 1/2 tsp salt
  • 2 1/2 cups half and half, or 1 cup cream, 1 cup whole milk
  • 2 tbs butter
  • 1 tsp vanilla
  • dash of cinnamon (optional)
  1. In a heavy bottomed saucepan, bring the apple cider to a strong simmer until reduced to a little under 1 cup. This may take about an hour.
  2. In a large measuring cup, or a medium mixing bowl, separate the eggs and whisk in the cornstarch and salt thoroughly, making sure there are no lumps. To temper the eggs, ladle the hot reduced apple cider into the very slowly (you can’t go too slowly), until at least half of the cider is incorporated and the cup/bowl is warm to the touch. Whisk until smooth.
  3. Slowly whisk the half and half into the egg and cider mixture.
  4. Pour the entire egg mixture back into the saucepan with the rest of the cider and bring up to a low-medium heat whisking or stirring until it reaches the desired thickness. Once it starts thickening, it should continue quickly. I like my pudding on the thicker side, so I let it thicken until it drips very slowly from the whisk and then it will thicken further as it cools.
  5. Remove from heat. Whisk in the butter vigorously, then add the vanilla and cinnamon if using and give it a final mix.
  6. Pour into 6 ramekins, cover with plastic and refrigerate for a few hours or overnight until set.
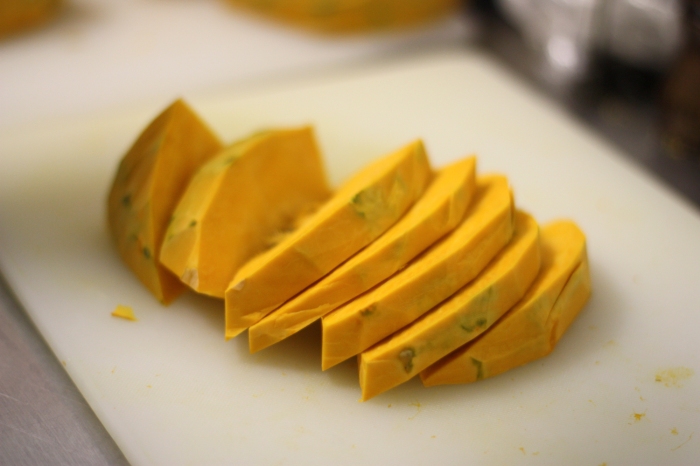
Kabocha squash slices on a cutting board

A perfect way to get some extra fall flavor into a simple warming pasta dish. I know a lot of people who don’t like winter squash very much. I blame this on the fact that most winter squash (think pumpkin, or any squash with meaty orange flesh) is served sweet with pie flavorings like nutmeg and cinnamon. I was pretty ambivalent about pumpkin in anything other than pie before I learned how to use it too. Some pairings I’ve found that work well with winter squashes are rosemary, ginger, bacon (as an aromatic).

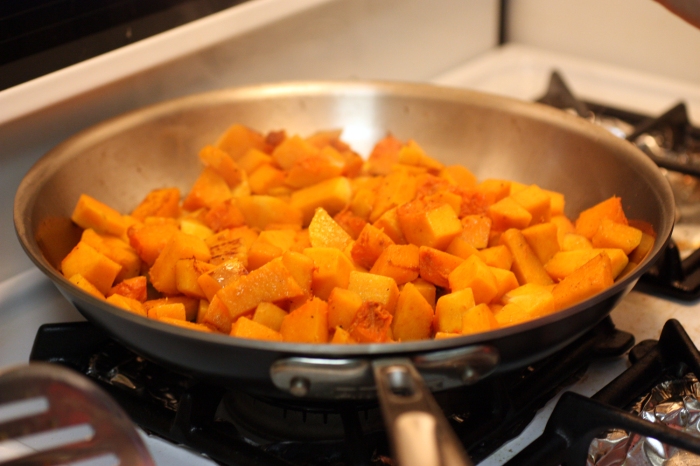
Cubes of squash cooking in a pan

But these flavors rely on the squash to take center stage. If you’re still not sure about squash (or you’re feeding someone who isn’t), you can use it to give body and just a mild flavor to a tomato sauce, and complement it with bit of chili or cayenne pepper. In this recipe, I use butternut squash, because I find it one of the most flavorful and easy to break down. Any winter squash would probably work well here. Kabocha slices are pictured above, and cubes of butternut squash are visible in the second image.

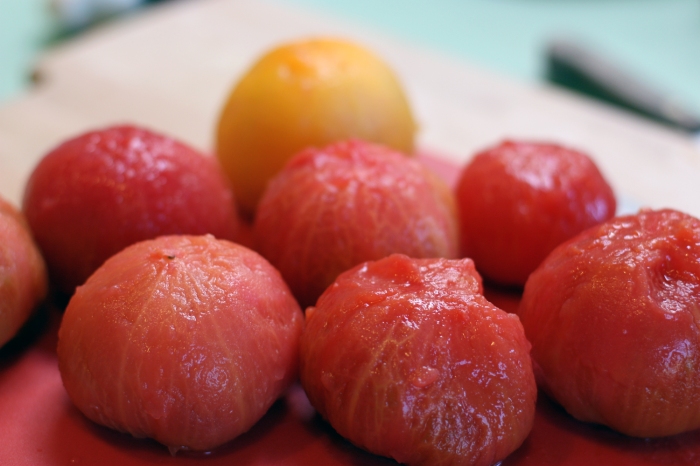
Peeled heirloom tomatoes

This is my go to sauce. It helps me use up any squash I have laying around the house, and makes a regular pasta/sauce night a bit more exciting and nutritious. It makes a great cheesy non-dairy dish.

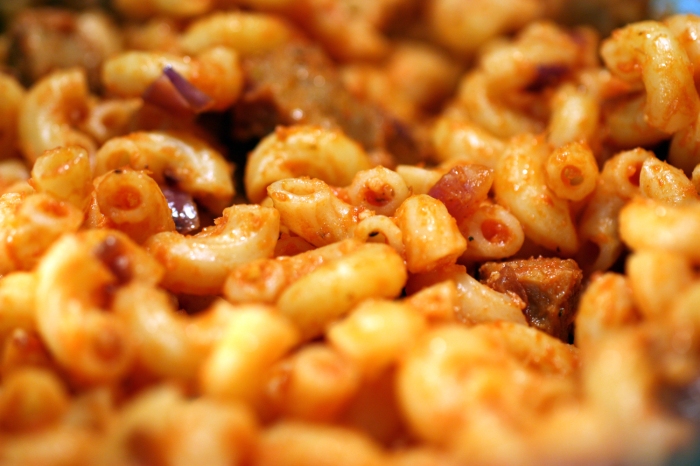
This sauce sticks so nicely to a textured pasta

Recipe: Tomato-Squash sauce

Makes 6-8 servings

  • 1 1/2 lbs fresh tomatoes or can of crushed tomatoes
  • 1 1/2 cup raw butternut squash, chopped (or 1 cup cooked and pureed)
  • 1 red onion, chopped fine
  • 3 cloves of garlic, minced
  • 1/2 tsp cayenne pepper
  • 1 tbsp olive oil
  • 1/2 cup of water, vegetable or chicken broth
  • salt and pepper to taste
  1. If using fresh tomatoes, cut an X onto the bottom of each tomato and then blanch in a pot of boiling water for 30 seconds (less if they are small, more if they are very large). Then, shock them in an ice water bath or under a cold water rinse, before trying to peel. Remove the skins. Slice the tomatoes in half and scoop out the seeds. Feel free to chop the tomatoes into smaller pieces for the sauce if you do not plan on pureeing. 
  2. Add oil to a saucepan and bring to low heat. If using raw squash, add the cubes to the pot, and saute until they begin to soften. Stir frequently When you can poke through pieces easily with a fork, you can move on to the next step.
  3. Add the tomatoes (and all juices), onions, garlic, and cayenne. Allow the mixture to stew for 10 minutes uncovered, stirring occasionally so nothing sticks to the bottom. If the mixture is dry, add about 1/2 cup of water, vegetable stock, or chicken broth to give the vegetables a place to dissolve. 
  4. If you are not planning on pureeing, you can stir or mash until the squash dissolves. Otherwise, now is when you will want to puree the mixture. Add salt and pepper and taste. 
  5. If the sauce is too thin for pasta, allow to reduce until it reaches the thickness you prefer. If it is too thick, add more water/broth until it reaches the consistency of pasta sauce. 
  6. Mix pasta of your choice into the sauce, or pour the sauce over the pasta. Enjoy! 
Sometimes I add a bit of browned spicy Italian sausage crumbles to the mix to give it an extra kick, but it is just as wonderful without the meat. 

Bacon Caramel Candies

The Northeast is being beaten down with what some are calling “Frankenstorm”, and it seems like Halloween plans might need to be postponed. But as long as you’ve still got power or gas, there’s no reason you can’t enjoy some candy. I’ve been in a candy making mood lately and these tend to be at the top of my list whenever I get down to it.

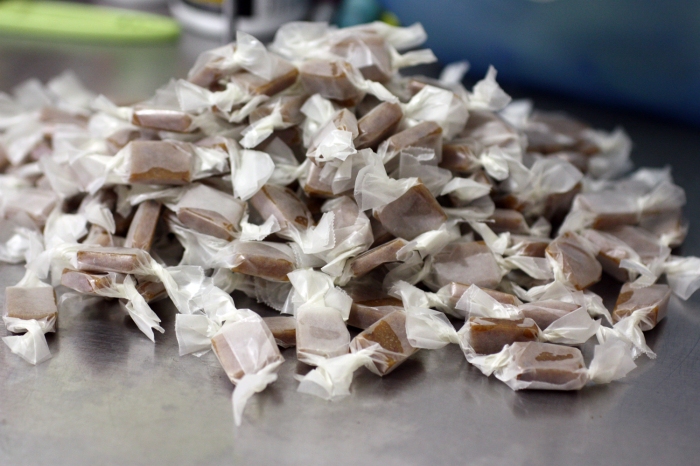
Bacon caramels individually wrapped in wax paper

You may have heard of pig candy – which is made coating bacon strips in brown sugar and baking them. Like any bacon lover, I was intrigued enough to try this once. It was tasty, but not worth the mess. The unexpected mess, the grease and excess sugar that come off the bacon, however, was worth the entire experiment. The sugar had caramelized and mixed with the fat to form a deeply flavorful candy-like sauce. It was delicious enough that it inspired me to look up how caramel candies are made to see if I could somehow baconize them, and recreate the accidental candy without having to ruin good bacon in the process.

Four strips of bacon sizzling in a cast iron pan

A basic caramel candy involves a fat, a sugar, and then cream or milk to soften it and make it chewy. Usually the fat is butter and the sugar is granulated white sugar, corn syrup, and maybe brown sugar. But since the bacon fat did such a great job imparting bacon-y flavor to the candy on the baking pan, I knew it would work in candies in place of butter.

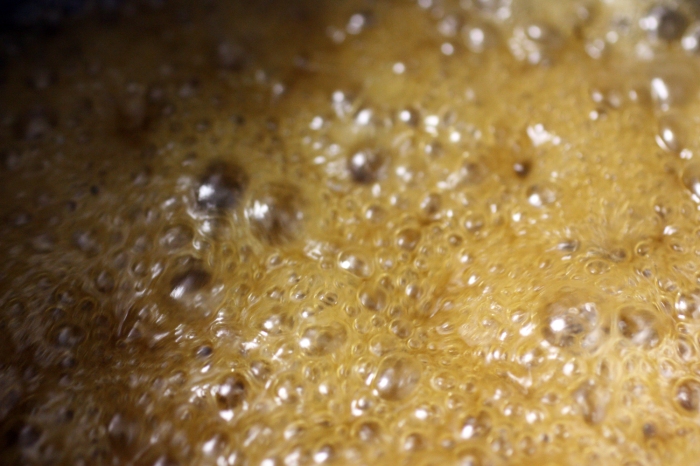
Caramel bubbling in a pot

How do you get the bacon fat? By cooking bacon, of course. To get the amount of bacon you’ll need for this recipe, you’ll need to have cooked about a quarter pound of bacon, which can be anywhere from 4 to 8 strips depending on the kind and thickness of the cut. Since you don’t need very much, I recommend using the best bacon you can find and afford here. It makes a big difference. And you deserve good bacon. Have yourself some bacon waffles, a bacon scallion quiche, or a deviled egg salad sandwich. Or just eat it. I don’t think I need to tell you how to enjoy bacon.

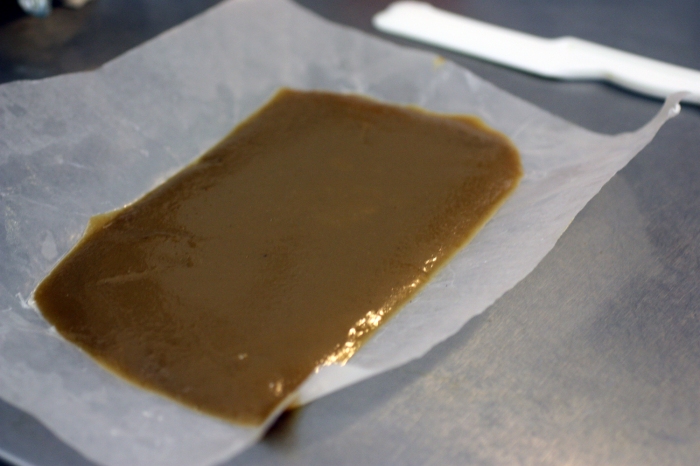
Bacon caramel cooling and setting on waxed paper

After a lot of experimenting, and many taste testers, I found that a maple flavor really helped bring out the bacon and deepened the flavor of the caramel.

Recipe: Bacon Caramel Candies

Makes about 100 candies

  • 1/4 cup sugar
  • 1/4 cup brown sugar
  • 1/2 cup Grade B maple syrup
  • 1/8 cup dark corn syrup
  • 1/4 cup bacon fat
  • 1/2 cup milk
  • sea salt
  • wax paper
  • candy thermometer, if you have one
  1. Line a loaf pan, or other pan with a small bottom surface area, with wax paper. 
  2. If you have a candy thermometer, attach it to the side of a heavy bottomed pot. Add the sugar, brown sugar, maple syrup, and dark corn syrup, and set the pot on low heat. Stir until it all dissolves and forms a smooth bubbling liquid. 
  3. Add the bacon fat, and keep stirring until the temperature reaches about 230 degrees Fahrenheit. If you aren’t using a thermometer, you can test by dropping bits of the caramel in a small glass of cold water. When it forms threads of sugar, it is ready. Remove from the heat. 
  4. Add the milk, stir. Return to the heat and stir until the temperature reaches about 245 degrees Fahrenheit, or forms a ball that stays fairly firm if you roll it between your fingers in a water test. Remove from the heat. 
  5. Pour into the wax paper in the loaf pan as quickly as possible, before the caramel starts to harden. Be careful, even though it will begin to harden immediately, it will still not be cool enough to taste. The spoon or spatula you use to get it out of the pot will be especially hot. Sprinkle sea salt on the top of the caramel. 
  6. Allow to cool for 30 minutes to 1 hour. Do not refrigerate. When the caramel is cool to the touch, you can begin to cut it. Cut it into small 1 inch x 1/2 inch x 1/2 inch pieces. Wrap each piece in a small square of wax paper and twist the ends. Give them to everyone you know! 


I can’t hide it any longer. I’ve broken through a culinary barrier that I thought would wait at least until I had a gigantic non-city kitchen. I’ve started canning. You know, putting things into jars (not cans, which we’ve had a lot of confusion over in my house), putting the jars in boiling water for a certain period of time, so that the lids eventually seal once removed from the water, and then you can keep the jars unopened on your shelf like store-bought goods.

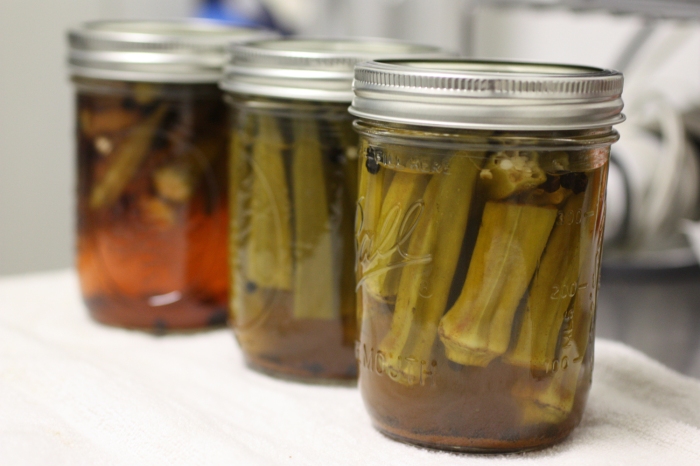
First jars of spicy pickled okra, right out of the canner

It was only a matter of time really. My love of all things pickled had already filled our fridge beyond its capacity with assorted jars at various stages of pickling. We would give some away, but the problem remained. We had just too many jars in the fridge at once. Sometimes several of the same thing, depending on how big the batch I made was. I really needed to find a way to make the second and third jars of a batch shelf stable, so they wouldn’t stay in the fridge while we ate through them, getting more and more fermented as time went on.

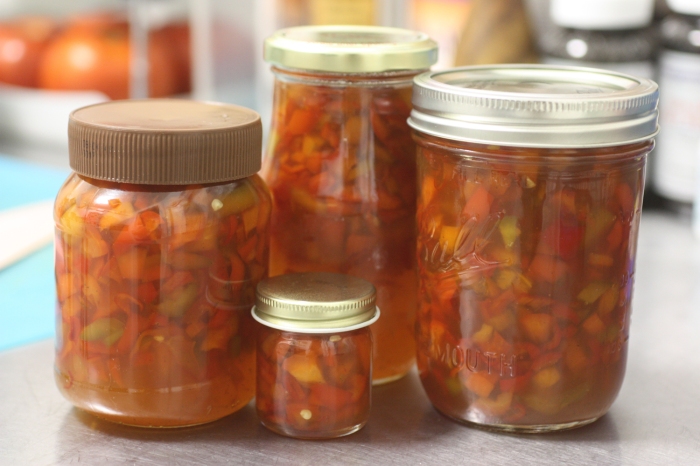
Family of hot pepper jam jars, not sealed.

I also couldn’t help but envy the beautiful standardized jars that I kept seeing in certain Flickr pools. Those Ball/Mason/Kerr jars are just so pretty when they’ve been filled with colorful tasty things, lined up in a row. I also liked the idea of having smaller jars of various pickles and preserves so we could switch them out for some variety and not be stuck with a huge open jar of something we eat sparingly.

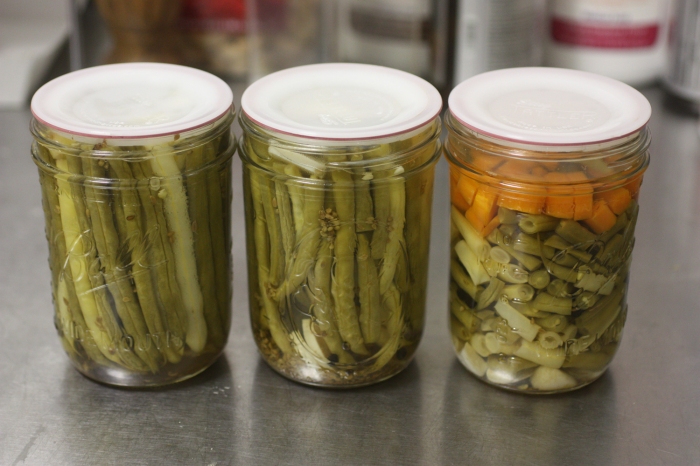
Pickled green beans, and some carrots.

I avoided this hobby for as long as I could – thinking that it might be too complicated, or involve to many tools that would sit around my small apartment, taking up space and collecting dust. But when my mom called me to say she saw a good price on wide-mouthed pint jars, I decided that I couldn’t wait any longer. Into the canner I went.

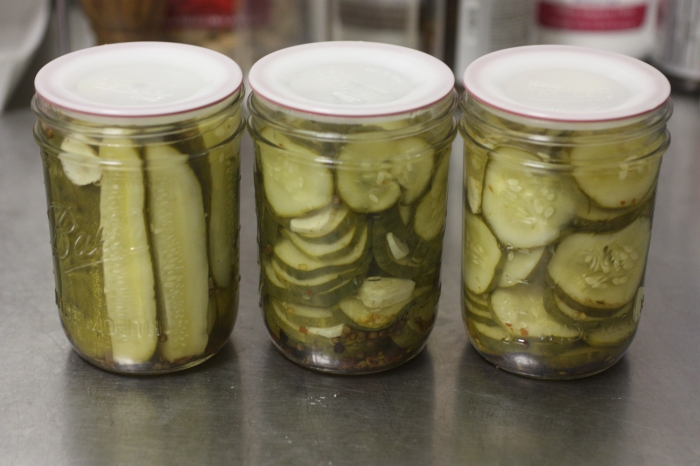
My bread and butter pickles, cooled and sealed

I was eased into the idea of canning for the last year or so, following Marisa at Food in Jars, and a slew of other blogs that occasionally mentioned lids and rings and jar lifters. Food in Jars taught me that I could can small amounts (3 pints) and explained all the ways I could set up my own canning rig without much specialized equipment. I’m using a big stock pot, a great little trivet that Marisa mentioned to keep the jars off the bottom, a jar lifter (specialized tongs), and kitchen towels.

I’m not sure how much more I’ll be talking about canning here, because I’m still new to it and there are “experts” out there that I’d rather you trust on the subject instead of me in this case. Following recipes is very important in order to keep food safe to consume after it has been on a shelf for weeks/months. But if this is something you’re interested in, here are some of the recipes and resources I started with:

Food Safety

Recipes

I have tried the following recipes. They are good bases, though not always the most exciting in flavor. I am planning on adjusting the spices, while leaving the amounts of acid the same to keep them safe.

Equipment

Please note that I have bought the following linked items myself, and am recommending their use because I have found them to be useful. The links are affiliate links.

Chick(pea) Nuggets

Plate of chickpea nuggets on top of a pita

Last year when we were exploring vegetarian proteins, we started getting all kinds of high protein flours. The most versatile and relatively cheap flour I found was chickpea flour. The first thing I tried to make with it was falafel, using the recipe on the package. We enjoyed them in pita with tahini sauce and lettuce and tomato. They were wonderful, though not the same as the crispy balls of falafel that one sees more often, made of mashed chickpeas. They were very easy to make, just mix some flour and various spices and water, scoop into a pan and cook. Perfect for a weeknight dinner.

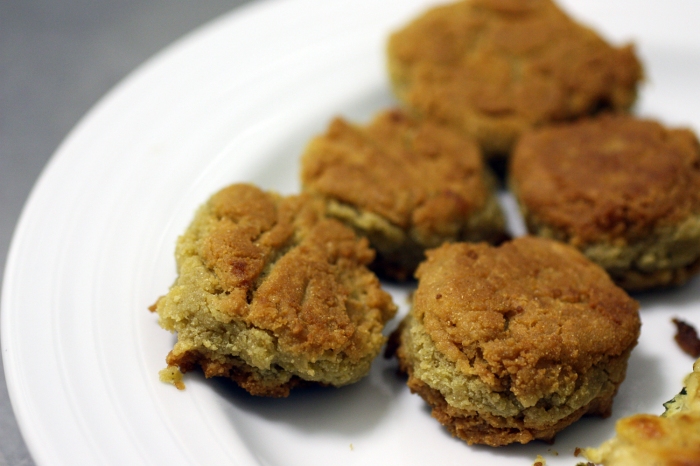
Plate of cooked chickpea nuggets

The flour was also useful in helping to bind various experimental gluten-free veggie burgers.

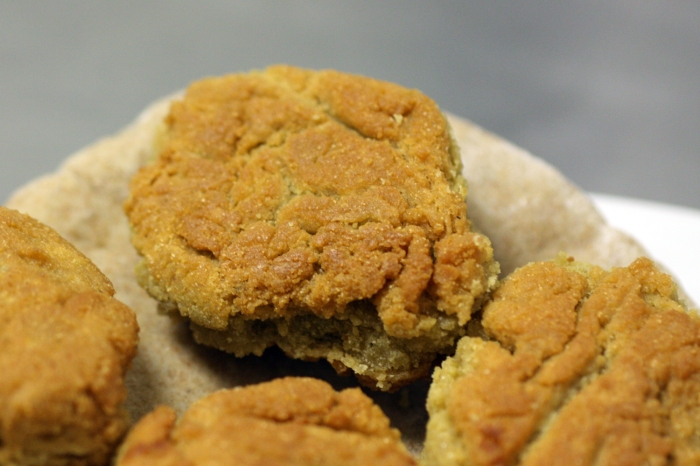
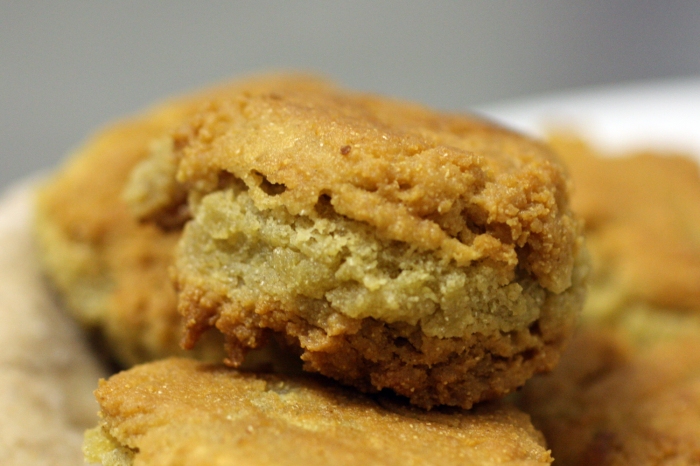
Chickpea nugget from the sideBut I kept coming back to that falafel recipe. It occurred to me, almost immediately, that if they didn’t have Israeli spices, the texture matched that of chicken nuggets remarkably well. I took the falafel recipe, made a few adjustments, and served them with honey mustard instead. Voila, a reasonable substitute for chicken nuggets that are easy to whip up at a moment’s notice.
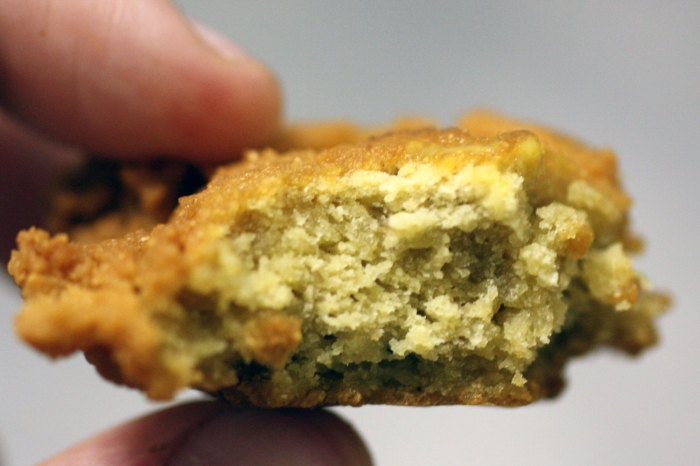
Chickpea nugget with a bite so the inside texture shows

Recipe: Chick(pea) Nuggets

Adapted from Bob’s Red Mill Falafel Patty recipe

Makes 10-14 nuggets

  • 1 1/4 cup of chickpea flour (also called garbanzo bean flour)
  • 1/4 tsp baking soda
  • 1 tsp garlic power or granules
  • 1/2 tsp salt
  • 2 tsp lemon juice
  • 1 tsp olive oil
  • 1/2 cup hot water
  • a few shakes of black pepper
  1. Mix together all of the above ingredients in a medium sized mixing bowl to form a thick pasty batter. Allow to rest for a few minutes while you prepare the pan to fry them in. 
  2. Heat a flat skillet with a few tablespoons of oil for frying. I use regular olive oil. I recommend a non-stick type of pan, as these do try to leave a film of flour behind unless you use a lot of oil. Prepare a plate with a paper towel to drain the nuggets as you remove them.
  3. Spoon tablespoons of batter into the hot pan and press down with the back of the spoon. When one side is crisp and a darker shade of golden brown, flip and cook on the other side. I usually fry them in batches, even with a large pan, so that they have space to brown nicely. 
  4. Remove fully cooked nuggets to paper towel and allow to drain. 

Enjoy warm for the best texture, though they are fine cooled and reheated in the microwave as well. Dip in honey mustard (mixture of yellow mustard, honey and a bit of mayonnaise) or whatever sauce you enjoy with your chicken nuggets. I can’t imagine any child who loves nuggets wouldn’t enjoy these. Try it and let me know!

The best buns

Nine freshly baked buns cooling on a rack

Before I found this recipe, we never seemed to have buns on hand. We always had slicing bread, and occasionally pita, and we would generally make do with those when we had hamburgers or anything else that required buns. One night we were completely out of bread, though, and we knew there was no time to pop a loaf in the bread machine (since bread takes about 5 hours to rise and bake in our bread machine). Amazingly, earlier in the week I had seen a recipe for “40 minute buns” on The Kosher Foodies.

*As a total aside, you’d think I didn’t live in a city where I could walk downstairs and find some buns or rolls or some kind of bread at pretty much any hour of the day or night within a one block radius. But that’s just not the kind of girl I am. 

Balsamic covered portobello mushroom cap in the middle of a fresh bun

Having made many kinds of bread in the past, I have to admit that I didn’t quite believe that the recipe would really work. I thought it would take longer than specified, or that the buns wouldn’t really rise. I was wrong to be skeptical. These are the best buns I’ve ever eaten, and some of the best bread I’ve ever baked. Fluffy, yet substantial, flavorful, beautiful, and best of all quick.

Now if 40 minutes still seems like too long on a busy weeknight, just make a batch or two and freeze them for later. We do this regularly, since we only use a few at a time. Then we always have them on hand for just about any kind of filling imaginable. And if we run out, it takes practically no time to whip up a new batch.

Two buns with egg and blue cheese sandwiched in the middle of each

Sometimes we make them smaller for little slider buns (16 per batch), and other times we make them larger for really hearty sandwiches (8 per batch). But usually they are somewhere in the middle, and we get about 10-12 per batch. I would not, however, recommend trying to make them in shapes other than spherical. It just didn’t work well the two times we tried it (though you may have more luck). It’s worth it to roll them into pretty good balls, so they don’t have crags running through them.

Recipe: Buns

This recipe is tailored to bread machines on the dough cycle, but it will work if you’re kneading manually too. For a more straightforward manual approach, see “40 minute buns” on The Kosher Foodies.

  • 1 cup warm water
  • 1 egg (room temperature is best – submerge a cold egg in warm, not hot, water for about 5 minutes if you need to bring it up to temperature quickly)
  • 1/3 cup vegetable oil
  • 1/4 cup sugar
  • 1 tsp salt
  • 3 – 3.5 cups all purpose or bread flour – you can include a bit of whole wheat flour but no more than 1 cup
  • 2 tbs active dry yeast or bread machine yeast
  1. If using a bread machine, add all of these ingredients to the bucket part of your machine, in the listed order. When adding the yeast, make a little divot in the flour to cradle the yeast in. Set the machine to a dough only (no bake) cycle, and make sure not to let it rise for more than 30 minutes in the machine.
  2. Lightly flour the pans you plan to bake the buns on, or line with a silicon baking mat. Pull the dough out of the machine, or bowl, onto one of the pans, and separate into two parts. Keep splitting the dough until you have the desired number of segments (see above the recipe).
  3. Roll each segment into a ball and place evenly apart on the baking pans.
  4. Preheat your oven to 425 degrees.
  5. Cover with a towel and allow to rise for 10 minutes.
  6. Remove the towel and bake for 10-15 minutes (on the lower end if the buns are small, on the higher end if the buns are big). Buns should be golden brown.
  7. Allow to cool and either enjoy while warm, or allow to cool completely and freeze in freezer safe bags to enjoy later.

We put beef burgers, turkey burgers, veggie burgers, portobello caps, sloppy joes, chicken salad, eggs and/or cheese. The list is really endless – anything you would want on a bun. They really stand up well to moist ingredients, which I am always grateful for, since I like pickles or kimchee on just about every sandwich.

Za’atar Pita

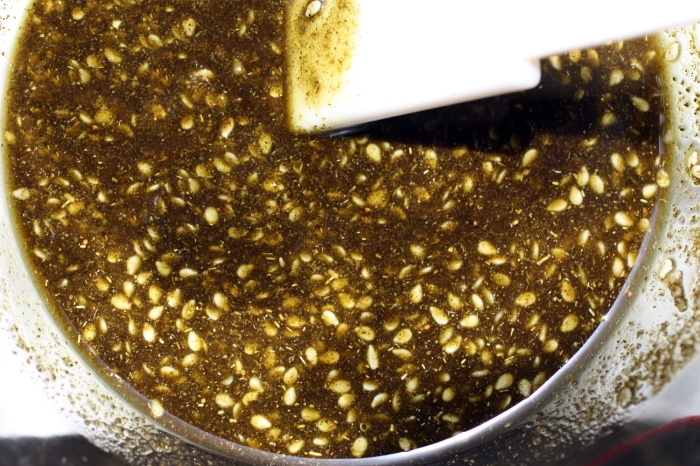
Bowl of zahatar spice and olive oil mixture

Za’atar is a Middle Eastern spice blend. I can’t even describe how to pronounce it because I don’t really know what the right way is myself. Growing up, it was this mysterious mixture we put on top of pita and microwaved, sometimes with mozzarrella cheese on top as well, wafting this strong unique scent throughout the house. It wasn’t until I tasted that familiar flavor in a dipping oil at the upper west side restaurant Vareli (where they also crust a pork chop with it) that I even thought to bring it into my adult life.

Zahatar on pita, before toasting

I never really gave much thought to what it was made of when I was younger. It was just za’atar. But once I tasted it outside of a family context, I just had to figure it out. Many spice stores sell something called za’atar, but pretty much every blend of it is unique. It seems every Middle Eastern locale, or even every household has their own exact proportion of flavors that make up za’atar. Generally, they can include ground thyme, oregano, marjoram, hyssop, sumac, and whole sesame seeds. The more sumac there is, the redder the mixture will be. I grew up with a dark green kind, but I’ve also seen it in a pistachio color that most likely had no sumac at all.

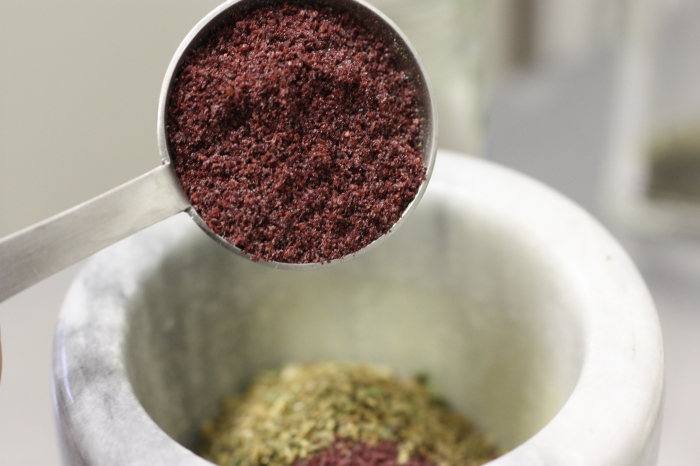
One tablespoon of ground sumac

Every variety is delicious as far as I’m concerned. To make za’atar pita, you simply mix the spice mix with olive oil and salt to taste (I like it to be rather salty), and paint it on top of a pita, or pita wedges. Thin it with oil as much or as little as you like. Some people even just mix the spice with salt and dip soft bits of bread into it and eat it like that. The following mix is a bit mild. I think it is the hyssop (which I’ve never seen in a store) that gives it the characteristic sharp, burns-the-back-of-your-throat taste.

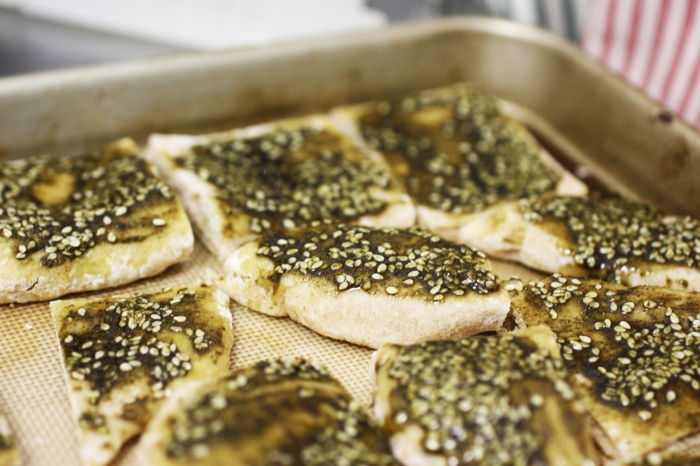
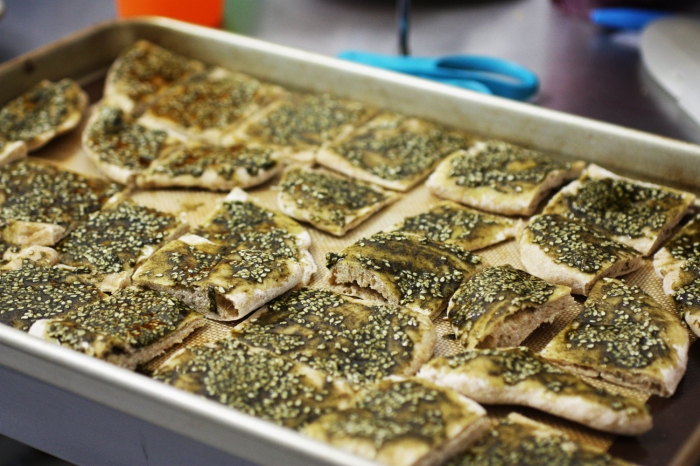
Zahatar chips on a pan

Recipe: Za’atar spice mix

Makes about 3.5 tablespoons – multiply or divide as needed. Store leftovers in an airtight container.

  • 2 tbs dried thyme
  • 1 tbs dried oregano or marjoram
  • 1 tbs ground sumac
  • 1 tsp sesame seeds
  • 1/2 tsp salt

Mix or grind together, and enjoy on anything that tastes good. Mix with oil to paint onto other foods, or use as a dry rub. Heat brings out the aroma, but be careful not to burn it or it may become bitter.

Have you ever had za’atar before? What did you eat it with? What do you think it had in it?

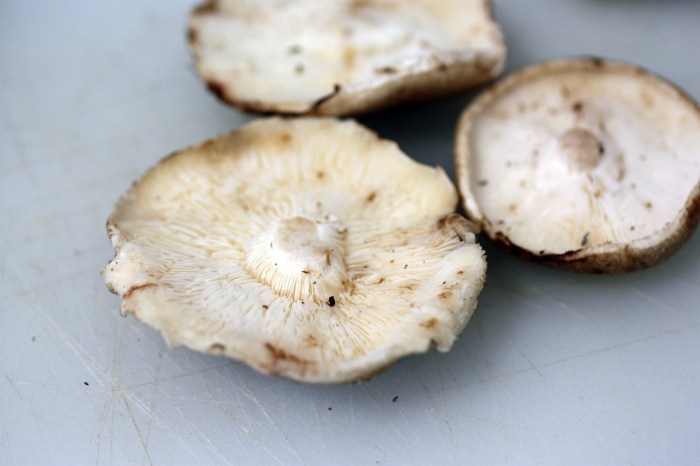
Three shiitake mushroom caps, gills up, on a cutting boardLast year, Jen and I decided to increase the vegetarianism in our diets. We didn’t cut out animal products entirely, but we stopped buying meat and most of our meals were vegetarian or vegan. Among many other reasons for making this change, we really want to shake our cooking up. While we have gone back to eating meat this year, the time we spent without it taught us a lot about what sates our appetites.

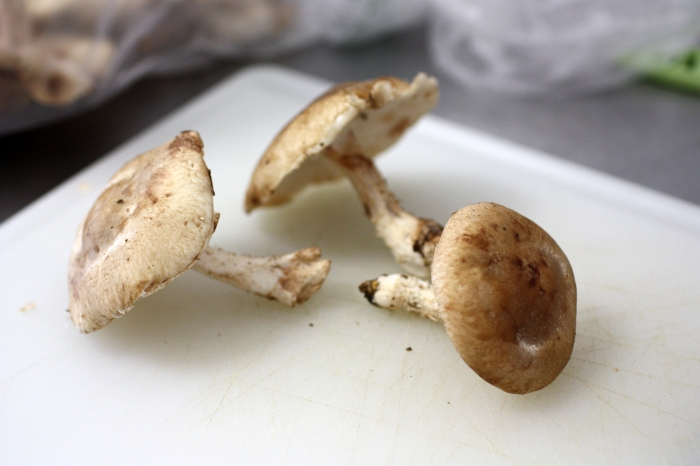
Three fresh shiitake mushrooms, on their sides, on a cutting board

I don’t find meat to be an essential part of a meal, in general. But if you are used to cooking with it regularly, it can be a challenge creating balanced meals without it. That’s probably why so many “meat” substitutes exist. Don’t get me wrong, protein is an important nutritional element, and many touted meat substitutes such as tofu (soy), seitan (made of wheat gluten) or tempeh (another soy product) provide that nutrient in abundance. But I do find that some people (mostly non-vegetarians) get much more worked up over getting enough than the average person really needs to worry about. Grains, legumes, and many vegetables can provide just as much protein when included regularly in a diet.

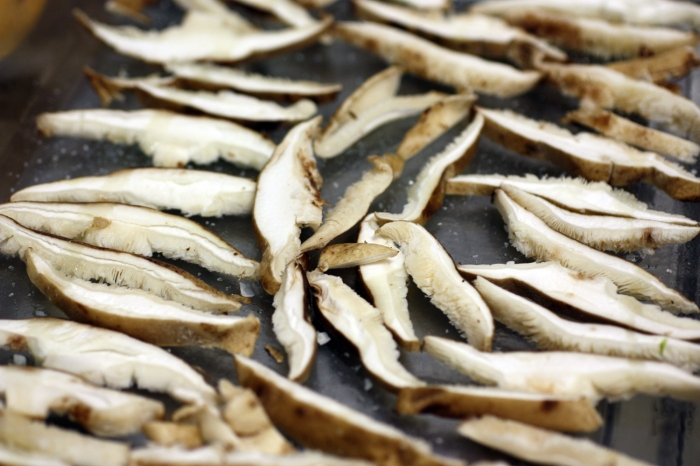
Sliced strips of shiitake mushroom caps on an oiled glass pan

Meat substitutes can be great, and I plan on talking more about them in future weeks. If you’ve read much of this blog, you have probably gathered that I prefer food to be processed as little as possible when I begin cooking with it. So I knew that no matter what we were going to be eating we would be making much of it ourselves. And that points out another problem with relying on most meat substitutes for the bulk of a vegetarian diet – they are often heavily processed and expensive.

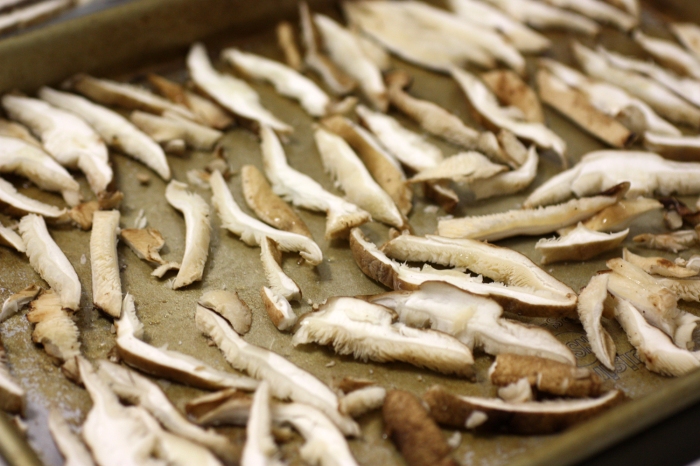
Sliced strips of shiitake mushroom caps on an oiled metal baking sheet

In my new diet, I wanted to focus on fresh food, that I knew as much about as possible, and that would keep me interested and coming back for more. I also had to combat with no longer having some of my favorite foods, which was less about nutrition or cost cutting and more about giving my taste buds what they wanted. After going without bacon for some time, I did begin to crave it quite a bit. That’s when I remembered this recipe that I had come across when following a recipe for seitan bourguignon (also amazing, but we’ll get to that later).

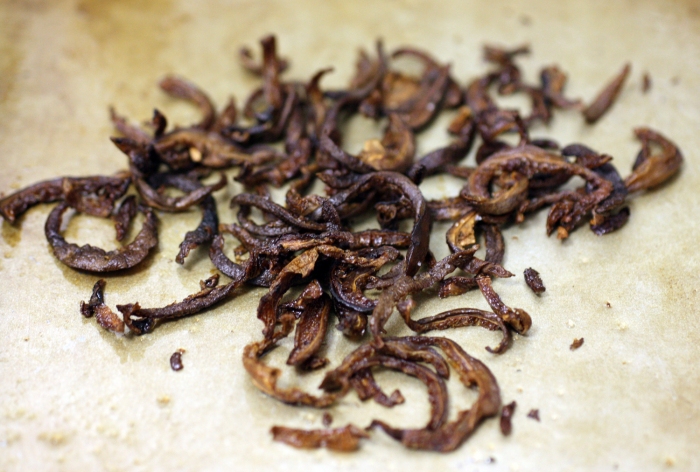
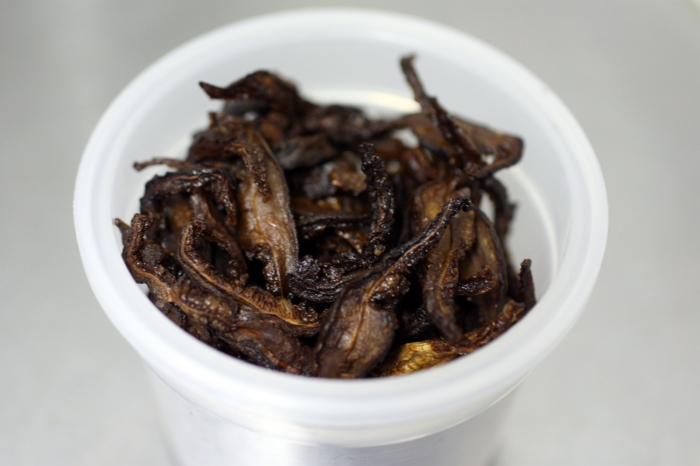
Crispy roasted shiitake mushroom strips on a metal baking sheet

Fresh (undried) shiitake mushrooms are used here, roasted with a bit of oil and salt, until they are crispy. It’s not just the crisping that makes them wonderful – though the texture is quite addictive. The musky, sulfuric flavor of shiitake mushrooms turns into magic when they are cooked. They take on a remarkable similarity to the meaty, salty, umami of bacon. It’s not an exact match, for sure, but it’s so close, I’d wager that someone might be fooled in a blind taste test.

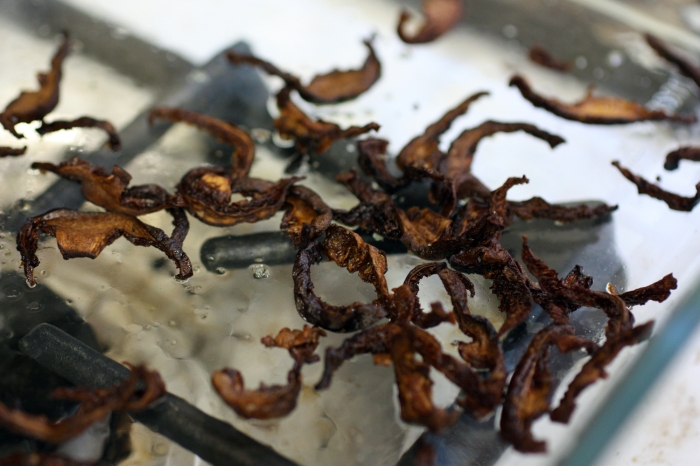
Crispy roasted shiitake mushroom strips on a glass pan

I couldn’t believe how good they turned out, I made them over and over again. This is a recipe any person who avoids bacon, or meat, should have in their repertoire. The only downside is that a pound of mushrooms, once the stems are removed, and the caps are cooked, turn into maybe a cup of crunchies. At the lowest price I’ve found for fresh shiitake, that’s much steeper than the price of even good bacon.

Crispy roasted shiitake mushroom strips in a small round tupperware

Recipe: Roasted Shiitake Bacon

Recipe originally found on WholeLiving.com

  • 1/2 to 1lb fresh shiitake mushroom caps, sliced
  • 1 tbs olive oil
  • light sprinkle of course salt
  1. Preheat oven to 350 degress. 
  2. Spread mushroom slices on an oiled pan. A glass or pyrex pan cooks more slowly, a metal pan cooks more quickly. I found I liked the way they came out better on the glass pan, but they took a lot more time to crisp. 
  3. Allow to roast uncovered, tossing every 10 minutes, until dry, crisp, and not burnt. The first few times you check on them, they may not seem like they will ever become crispy, but have patience. The process can take anywhere from 30 minutes to an hour depending on the amount of mushrooms, and the kind of pan. 
  4. Once removed from the oven, allow to cool. 

Enjoy anywhere you might include bacon. And even more places. Since these were more like crumbles than slices, we put them on salads, wraps, on pizza, in macaroni and cheese, and crunched as a snack. The only place they didn’t really work was as a soup topping, as they became soggy pretty quickly.

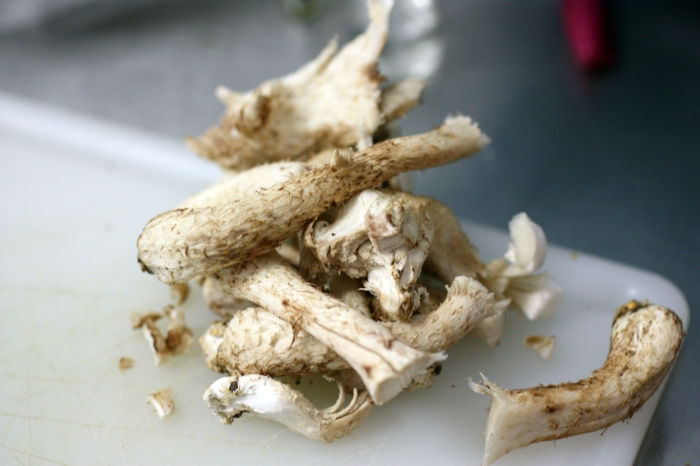
Hey! When you’re chopping up the mushrooms, don’t throw away the stems! They are full of flavor, even if the texture is unpleasant. Clean them off and use them to make a mushroom or vegetable stock. I just save them in a large zip-top bag in the freezer until I have enough to make a large pot.
Shiitake mushroom stems piled on a cutting board

New design

After over 3 years of presenting this blog using a mostly out-of-the-box WordPress theme, I finally figured out what I wanted to do instead. Presenting the new Get Cooking design!

GCB new design screenshot

I use my recipes all the time, and I generally look them up on my phone so I can see them in the kitchen. I got really sick of having to zoom in to see the recipe contents, so you’ll notice that now, when viewing the site on a small device, the right column drops to the bottom and the post content fills up the full width of the screen. There’s also a handy “Hop down to the recipe” link on posts with recipes, so you can jump past my rambling and right to the recipe, if you wish.

I hope you enjoy the new design. If you notice anything not working in a way that makes sense, or have any features you would like to see, just let me know.

Seared sea scallops over mushroom and garlic scape risotto

Tonight’s dinner was the first in a long time that I’ve actually wanted to share ’round these parts. I needed a good blog break to refocus on what it is I want to share here. Continue Reading »