Feeds:
Posts
Comments

Posts Tagged ‘dairy’

Apple Cider Pudding

Ramekin of pale peach-colored Apple Cider Pudding with a spoonful removed.

This past week, I became obsessed with Smitten Kitchen’s luxe butterscotch pudding recipe. It’s got eggs, cream, butter, and a deep caramel flavor. What’s not to love? I made it for my two kids and they went wild. I’d also been eyeing Smitten’s apple cider caramels recipe and thinking of my own bacon caramels, and imagining doing a mashup. While licking a last spoonful, my daughter declared that she wanted apple pudding next and I had a brilliant idea. Instead of making caramels that I would feel guilty having around the house, I would turn that apple cider into the butterscotch for the luxe butterscotch pudding. With the eggs and dairy, it’s almost a meal, so I’m not a horribly irresponsible parent for letting them have as much as they want, I tell myself.

Well, it came out far better than I imagined. The apple flavor is so intense and tart. The creamy custard silkily complements the whole thing. I let me daughter scrape the cooled down pot clean and she looked like some kind of rabid creature when we tried to take it away. If that’s not an endorsement, I don’t know what is.

Recipe: Apple Cider Pudding

Makes 6 servings

  • 6 cups apple cider
  • 3 tbs cornstarch
  • 2 egg yolks
  • 1 whole egg
  • 1/2 tsp salt
  • 2 1/2 cups half and half, or 1 cup cream, 1 cup whole milk
  • 2 tbs butter
  • 1 tsp vanilla
  • dash of cinnamon (optional)
  1. In a heavy bottomed saucepan, bring the apple cider to a strong simmer until reduced to a little under 1 cup. This may take about an hour.
  2. In a large measuring cup, or a medium mixing bowl, separate the eggs and whisk in the cornstarch and salt thoroughly, making sure there are no lumps. To temper the eggs, ladle the hot reduced apple cider into the very slowly (you can’t go too slowly), until at least half of the cider is incorporated and the cup/bowl is warm to the touch. Whisk until smooth.
  3. Slowly whisk the half and half into the egg and cider mixture.
  4. Pour the entire egg mixture back into the saucepan with the rest of the cider and bring up to a low-medium heat whisking or stirring until it reaches the desired thickness. Once it starts thickening, it should continue quickly. I like my pudding on the thicker side, so I let it thicken until it drips very slowly from the whisk and then it will thicken further as it cools.
  5. Remove from heat. Whisk in the butter vigorously, then add the vanilla and cinnamon if using and give it a final mix.
  6. Pour into 6 ramekins, cover with plastic and refrigerate for a few hours or overnight until set.
Read Full Post »

Bacon Caramel Candies

The Northeast is being beaten down with what some are calling “Frankenstorm”, and it seems like Halloween plans might need to be postponed. But as long as you’ve still got power or gas, there’s no reason you can’t enjoy some candy. I’ve been in a candy making mood lately and these tend to be at the top of my list whenever I get down to it.

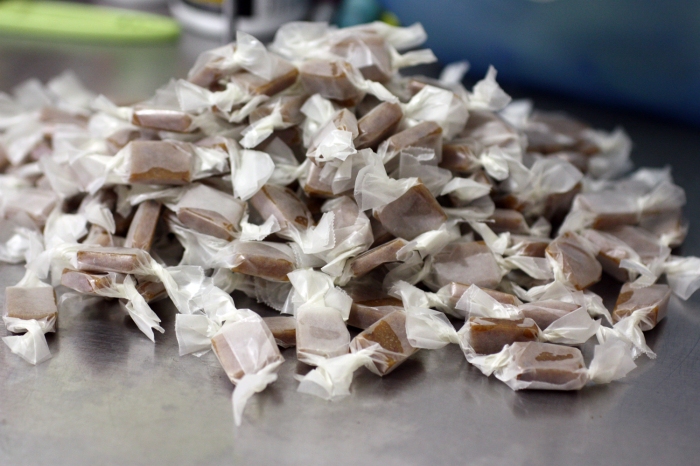
Bacon caramels individually wrapped in wax paper

You may have heard of pig candy – which is made coating bacon strips in brown sugar and baking them. Like any bacon lover, I was intrigued enough to try this once. It was tasty, but not worth the mess. The unexpected mess, the grease and excess sugar that come off the bacon, however, was worth the entire experiment. The sugar had caramelized and mixed with the fat to form a deeply flavorful candy-like sauce. It was delicious enough that it inspired me to look up how caramel candies are made to see if I could somehow baconize them, and recreate the accidental candy without having to ruin good bacon in the process.

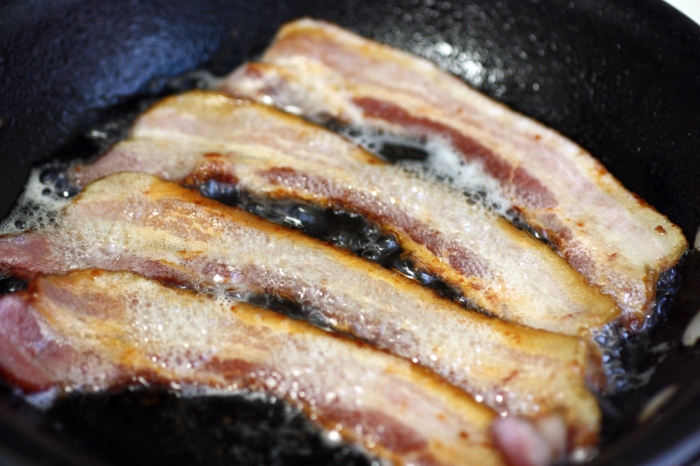
Four strips of bacon sizzling in a cast iron pan

A basic caramel candy involves a fat, a sugar, and then cream or milk to soften it and make it chewy. Usually the fat is butter and the sugar is granulated white sugar, corn syrup, and maybe brown sugar. But since the bacon fat did such a great job imparting bacon-y flavor to the candy on the baking pan, I knew it would work in candies in place of butter.

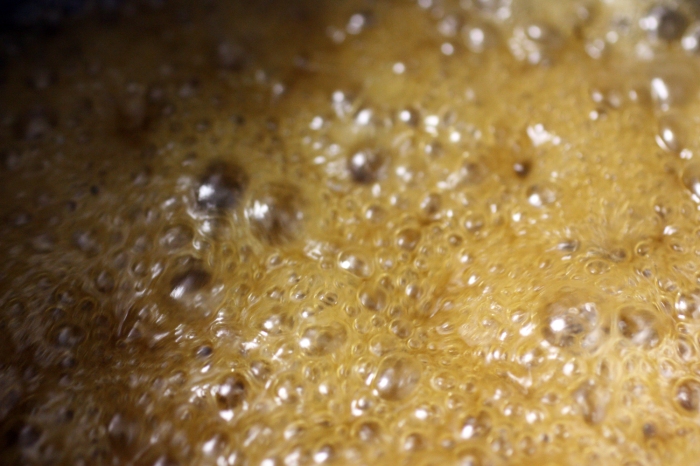
Caramel bubbling in a pot

How do you get the bacon fat? By cooking bacon, of course. To get the amount of bacon you’ll need for this recipe, you’ll need to have cooked about a quarter pound of bacon, which can be anywhere from 4 to 8 strips depending on the kind and thickness of the cut. Since you don’t need very much, I recommend using the best bacon you can find and afford here. It makes a big difference. And you deserve good bacon. Have yourself some bacon waffles, a bacon scallion quiche, or a deviled egg salad sandwich. Or just eat it. I don’t think I need to tell you how to enjoy bacon.

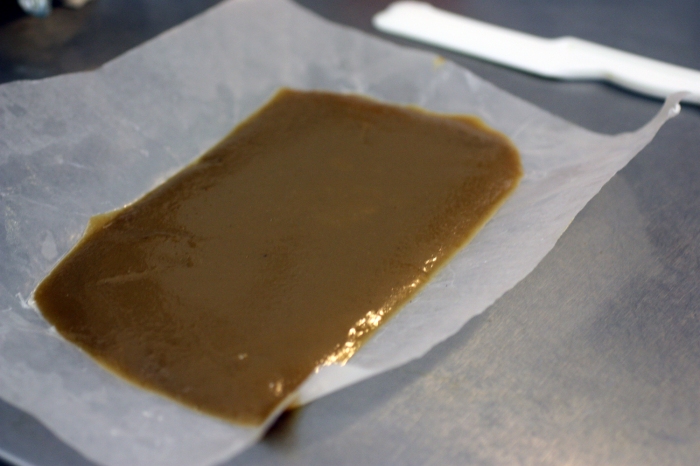
Bacon caramel cooling and setting on waxed paper

After a lot of experimenting, and many taste testers, I found that a maple flavor really helped bring out the bacon and deepened the flavor of the caramel.

Recipe: Bacon Caramel Candies

Makes about 100 candies

  • 1/4 cup sugar
  • 1/4 cup brown sugar
  • 1/2 cup Grade B maple syrup
  • 1/8 cup dark corn syrup
  • 1/4 cup bacon fat
  • 1/2 cup milk
  • sea salt
  • wax paper
  • candy thermometer, if you have one
  1. Line a loaf pan, or other pan with a small bottom surface area, with wax paper. 
  2. If you have a candy thermometer, attach it to the side of a heavy bottomed pot. Add the sugar, brown sugar, maple syrup, and dark corn syrup, and set the pot on low heat. Stir until it all dissolves and forms a smooth bubbling liquid. 
  3. Add the bacon fat, and keep stirring until the temperature reaches about 230 degrees Fahrenheit. If you aren’t using a thermometer, you can test by dropping bits of the caramel in a small glass of cold water. When it forms threads of sugar, it is ready. Remove from the heat. 
  4. Add the milk, stir. Return to the heat and stir until the temperature reaches about 245 degrees Fahrenheit, or forms a ball that stays fairly firm if you roll it between your fingers in a water test. Remove from the heat. 
  5. Pour into the wax paper in the loaf pan as quickly as possible, before the caramel starts to harden. Be careful, even though it will begin to harden immediately, it will still not be cool enough to taste. The spoon or spatula you use to get it out of the pot will be especially hot. Sprinkle sea salt on the top of the caramel. 
  6. Allow to cool for 30 minutes to 1 hour. Do not refrigerate. When the caramel is cool to the touch, you can begin to cut it. Cut it into small 1 inch x 1/2 inch x 1/2 inch pieces. Wrap each piece in a small square of wax paper and twist the ends. Give them to everyone you know! 


Read Full Post »

Cheddar, Corn, and Roasted Tomato Pie

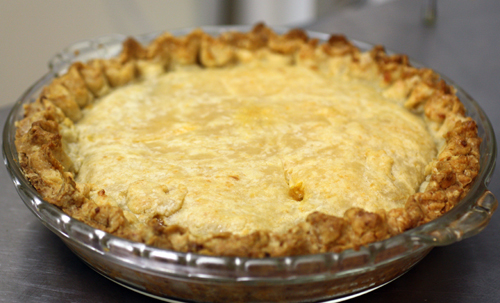
Finally, at long last, we have the top-rated #1 winner of the pie parade! This delicious, eclectic pie was inspired by smitten kitchen’s recipe, and then edited to the right level of moisture that I wanted for the inside of the pie by roasting the tomatoes instead of blanching them. The result is reminiscent of sun-dried tomatoes, and can be combined with various other veggies that roast well (leeks, spring garlic, etc.) to create fun variations on the filling for this pie.

Roasted tomatoes are a magical transformation of their fresh counterparts, but some types are too delicate for this process. I recommend a tomato that is likely to hold up in a roast and really retain a ton of flavor, such as Roma/plums, San Marzanos, or some local Heirlooms.

By switching to a cheddar cheese-infused crust, it really enhances the color and flavor to make this pie absolutely irresistible. Don’t forget to make some cute steam vents on top, they’ll brown up a bit at the end and show off this pie to make it a winner at any meal.

(more…)

Read Full Post »

Shepherd's Pie
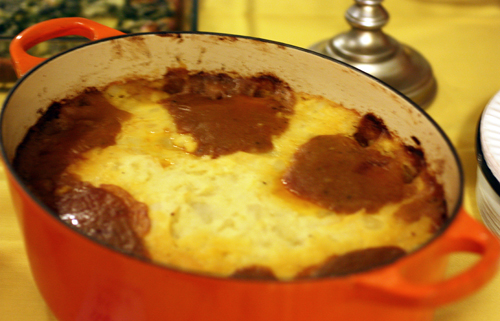
This photo does not do justice to the scrumptiousness that was this pie. It wasn’t pretty but it was one of the tastiest of all the pies, which is why it’s the second to last one on this list. A shepherd’s pie is a meat pie with a mashed potato topping. I decided to make this a deep dish casserole, and so I did not include a bottom crust. You might find this pie reminiscent of our staple biscuit-topped chicken pot pie.

While this was one of the least conventional pies we made, I’m so glad we included it. The gravy was savory and packed with flavor. My mouth is watering remembering this pie, even though I ate it over four months ago. Several friends at our pie parade told us that they thought they didn’t like shepherd’s pie until they tried this one. I can’t take total credit for it though – the recipe was Alton Brown’s. I made a few changes to stretch it for a larger group.

(more…)

Read Full Post »

Bacon Scallion Mushroom Quiche

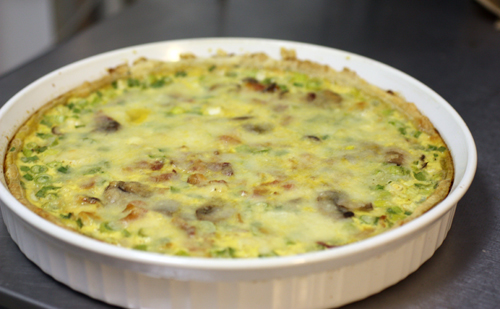
I know, it’s unforgivable that I should start such a long series about pies, leaving some of the best ones for the end, only to disappear before finishing. My only excuse is that I’ve been so busy testing this quiche recipe over and over and over again, to make sure it was just perfect for you. All I can say is that this quiche came out great every time I made it. It’s very flexible, very savory, and just irresistible. Do yourself a favor and make it this week. (more…)

Read Full Post »

Lemon Curd Pie
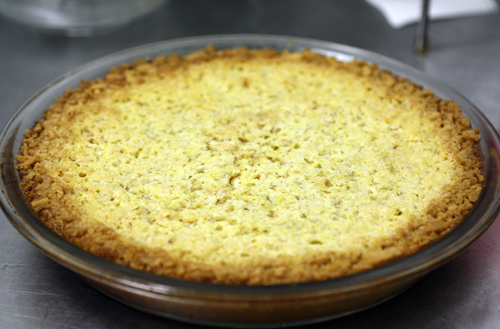
When you first see a pie like this one, it’s hard to know what’s under the surface. It’s certainly not what you’d expect. Crack beneath the crackly sugary top crust and you find a velvety lemon curd that you’ll wish you could spoon out of the entire pie just for yourself. Sweet and tart, gooey and crunchy, this pie needs nothing else. This is a lemon-meringue pie without the meringue. Who needs it when you get this creme-brulee-like crust on top? (more…)

Read Full Post »

Pumpkin Pie

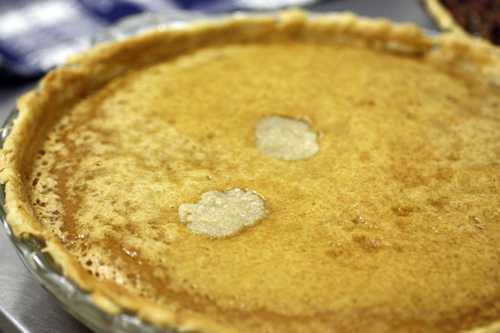
Pumpkin pie is a classic Thanksgiving pie, but there’s no reason you can’t have it all year round. During the fall, I usually get tasty pumpkins and squashes on sale, and then I bake and puree the flesh so that I can freeze it and use it all year long. Canned pumpkin is also generally available all year round, and I think it’s a convenient way to have pumpkin, though I prefer to make my own puree when possible. Incidentally, you may have heard that canned pumpkin is sometimes made of other winter squashes like butternut. Different squashes have different flavors and some taste more “pumpkin-y” than those little orange ones we usually associate with this time of year in America. Making the puree myself means I can figure out which flavors I like best, and I have a bit more control over the process. Some squash will be sweeter than others, and some squash may be more watery or stringy, so keep that in mind when experimenting.

Many people use sugar pumpkins for pumpkin pie – these are the smaller, round, orange-skinned pumpkins, not the big jack-o-lantern ones. This year, I found local cheese pumpkins on sale for ridiculously good prices, so I couldn’t resist picking one up. These pumpkins have a very rustic look. Their skin is sort of a pale peach color and they kind of look like a wheel of cheese, which is where their name comes from. The flesh, however, is very bright orange. I’ve used cheese pumpkins before in a pumpkin challah bread recipe (which I might have to try again soon), and I loved it, so I thought it would work well here. Despite the name, it is actually a sweet and flavorful pumpkin that doesn’t taste like cheese.

To prepare a pumpkin puree, wash your pumpkin and twist off the stem if there is still one on it. Hack into manageable pieces with a good heavy knife or cleaver. I hacked my cheese pumpkin into four, but a sugar pumpkin or small squash can usually just be cut in half. Scoop out the seeds – save for roasting and eating later while your pie chills. Place cut site down on a greased baking sheet. Tent with foil and bake in a 350 degree over for 40 minutes or until the flesh can easily be pierced by a fork. Remove from the oven and allow the pumpkin to cool to the touch. Then use a large spoon to scoop the flesh out of the skins. Puree the flesh with your choice of machinery. If the pumpkin seems watery, you can squeeze through a cheese cloth to remove extra liquid, or cook the pumpkin in a sauce pan to let some of the water reduce out. This is a beautiful photo tutorial for how to do this, from a site I thoroughly enjoy.

A note about the picture above:  I had some pumpkin cookie cutters and some extra dough. I thought I’d make some little pumpkin toppers. Next time, I’ll toast them first before adding them to the top of the pie…

(more…)

Read Full Post »

Starting from scratch

Once you start making foods from scratch, it gets a little addictive. It’s amazing how many every day foods aren’t really that hard to make yourself. But even I have limits (or at least I thought I did). I was talking to my mother the other day and mentioned how I had a great sandwich. The bread was homemade (we’ve stopped buying bread because ours is finally satisfying enough). The pickles were homemade too, and some of my best yet. “Soon,” I joked, “I’ll be making my own cheese.” I was really really kidding though.

And then Deb over at smitten kitchen had to go and post this ricotta cheese recipe. There are only 4 ingredients, all of which I generally have around. It looks too simple not to try. Once I do that, I know it’s just a hop, skip, and a jump to mozzarella. I’m not sure when I’ll get around to doing this, but when I do, I’ll be sure to let you all know how it went.

(Homemade peanut butter is also on the to do list, and since it doesn’t require a the heat of a stove, it might happen first.)

Read Full Post »

Cheesy Owl Crackers

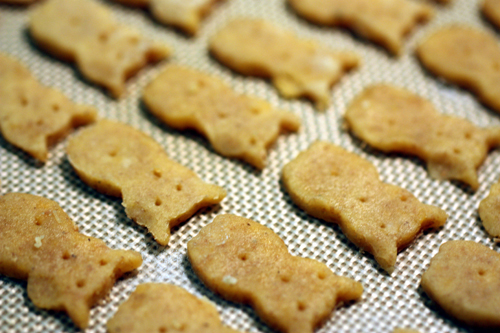
Owl Crackers with upside down faces about to head into the oven

I’m sure you’ll think I’m crazy, but I just couldn’t resist. After seeing Deb from Smitten Kitchen’s Whole Wheat Goldfish crackers I couldn’t not try them.  I also happened to have everything I needed on hand, including a block of ultra orange cheddar that had exactly 6 oz left. I had never made crackers before and they weren’t the easiest thing I ever cooked, for sure. But, filled with cheese and butter, they might be one of the tastiest. It’s really hard not to eat them all. (more…)

Read Full Post »

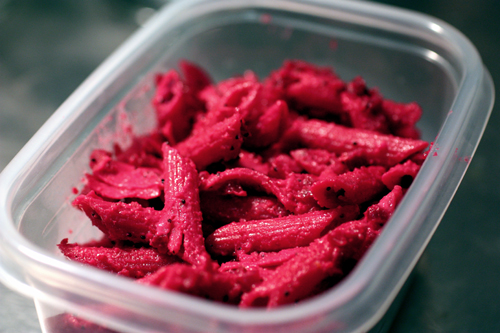
Beet and ricotta sauce on penne, ready for lunch

I’ve always loved beets: their color, a magenta that still seems unnatural every time I see it; their texture, tender and meaty; their flavor, bright, earthy and fruity. As a beet fan, it doesn’t take much to convince me that something with roasted beets in it is going to be delicious.

But because I enjoy them au naturel, I don’t usually do much to dress them up. I’ll generally roast them (or buy them already prepared), slice them and throw them on a salad or just eat them as a side with some salt and pepper.  So I somehow never thought to chop them, mix them up with ricotta cheese of all things, and stuff them into pasta. Why complicate something that’s so good when it’s simple? Because it’s ungodly good, that’s why.

That’s what I found out last weekend, when my friend Emma from Follows The Sun visited. She brought along this recipe for Casunsiei (Beet and Ricotta ravioli), which reminded her of a formative summer she spent interning at the restaurant that is famous for them. (more…)

Read Full Post »

Older Posts »