Feeds:
Posts
Comments

Archive for July, 2012

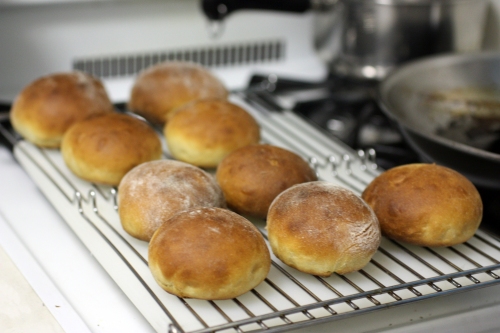
Nine freshly baked buns cooling on a rack

Before I found this recipe, we never seemed to have buns on hand. We always had slicing bread, and occasionally pita, and we would generally make do with those when we had hamburgers or anything else that required buns. One night we were completely out of bread, though, and we knew there was no time to pop a loaf in the bread machine (since bread takes about 5 hours to rise and bake in our bread machine). Amazingly, earlier in the week I had seen a recipe for “40 minute buns” on The Kosher Foodies.

*As a total aside, you’d think I didn’t live in a city where I could walk downstairs and find some buns or rolls or some kind of bread at pretty much any hour of the day or night within a one block radius. But that’s just not the kind of girl I am. 

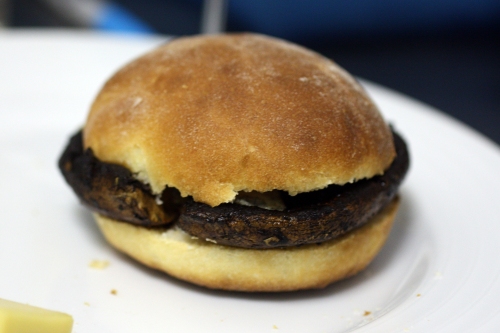
Balsamic covered portobello mushroom cap in the middle of a fresh bun

Having made many kinds of bread in the past, I have to admit that I didn’t quite believe that the recipe would really work. I thought it would take longer than specified, or that the buns wouldn’t really rise. I was wrong to be skeptical. These are the best buns I’ve ever eaten, and some of the best bread I’ve ever baked. Fluffy, yet substantial, flavorful, beautiful, and best of all quick.

Now if 40 minutes still seems like too long on a busy weeknight, just make a batch or two and freeze them for later. We do this regularly, since we only use a few at a time. Then we always have them on hand for just about any kind of filling imaginable. And if we run out, it takes practically no time to whip up a new batch.

Two buns with egg and blue cheese sandwiched in the middle of each

Sometimes we make them smaller for little slider buns (16 per batch), and other times we make them larger for really hearty sandwiches (8 per batch). But usually they are somewhere in the middle, and we get about 10-12 per batch. I would not, however, recommend trying to make them in shapes other than spherical. It just didn’t work well the two times we tried it (though you may have more luck). It’s worth it to roll them into pretty good balls, so they don’t have crags running through them.

Recipe: Buns

This recipe is tailored to bread machines on the dough cycle, but it will work if you’re kneading manually too. For a more straightforward manual approach, see “40 minute buns” on The Kosher Foodies.

  • 1 cup warm water
  • 1 egg (room temperature is best – submerge a cold egg in warm, not hot, water for about 5 minutes if you need to bring it up to temperature quickly)
  • 1/3 cup vegetable oil
  • 1/4 cup sugar
  • 1 tsp salt
  • 3 – 3.5 cups all purpose or bread flour – you can include a bit of whole wheat flour but no more than 1 cup
  • 2 tbs active dry yeast or bread machine yeast
  1. If using a bread machine, add all of these ingredients to the bucket part of your machine, in the listed order. When adding the yeast, make a little divot in the flour to cradle the yeast in. Set the machine to a dough only (no bake) cycle, and make sure not to let it rise for more than 30 minutes in the machine.
  2. Lightly flour the pans you plan to bake the buns on, or line with a silicon baking mat. Pull the dough out of the machine, or bowl, onto one of the pans, and separate into two parts. Keep splitting the dough until you have the desired number of segments (see above the recipe).
  3. Roll each segment into a ball and place evenly apart on the baking pans.
  4. Preheat your oven to 425 degrees.
  5. Cover with a towel and allow to rise for 10 minutes.
  6. Remove the towel and bake for 10-15 minutes (on the lower end if the buns are small, on the higher end if the buns are big). Buns should be golden brown.
  7. Allow to cool and either enjoy while warm, or allow to cool completely and freeze in freezer safe bags to enjoy later.

We put beef burgers, turkey burgers, veggie burgers, portobello caps, sloppy joes, chicken salad, eggs and/or cheese. The list is really endless – anything you would want on a bun. They really stand up well to moist ingredients, which I am always grateful for, since I like pickles or kimchee on just about every sandwich.
Read Full Post »

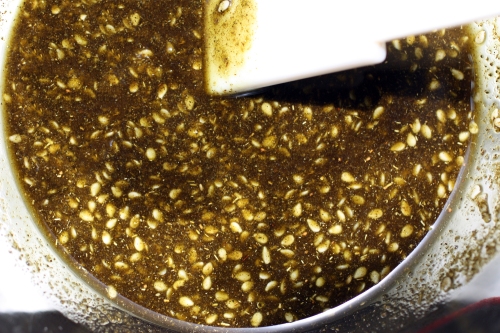
Bowl of zahatar spice and olive oil mixture

Za’atar is a Middle Eastern spice blend. I can’t even describe how to pronounce it because I don’t really know what the right way is myself. Growing up, it was this mysterious mixture we put on top of pita and microwaved, sometimes with mozzarrella cheese on top as well, wafting this strong unique scent throughout the house. It wasn’t until I tasted that familiar flavor in a dipping oil at the upper west side restaurant Vareli (where they also crust a pork chop with it) that I even thought to bring it into my adult life.

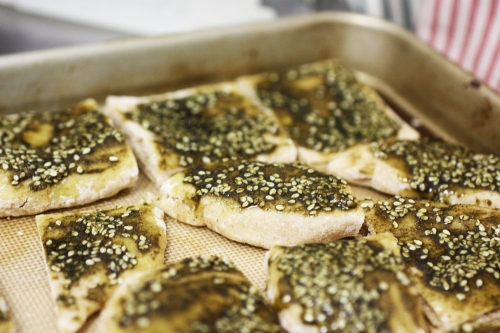
Zahatar on pita, before toasting

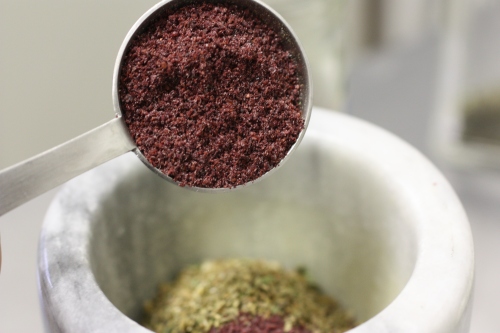
I never really gave much thought to what it was made of when I was younger. It was just za’atar. But once I tasted it outside of a family context, I just had to figure it out. Many spice stores sell something called za’atar, but pretty much every blend of it is unique. It seems every Middle Eastern locale, or even every household has their own exact proportion of flavors that make up za’atar. Generally, they can include ground thyme, oregano, marjoram, hyssop, sumac, and whole sesame seeds. The more sumac there is, the redder the mixture will be. I grew up with a dark green kind, but I’ve also seen it in a pistachio color that most likely had no sumac at all.

One tablespoon of ground sumac

Every variety is delicious as far as I’m concerned. To make za’atar pita, you simply mix the spice mix with olive oil and salt to taste (I like it to be rather salty), and paint it on top of a pita, or pita wedges. Thin it with oil as much or as little as you like. Some people even just mix the spice with salt and dip soft bits of bread into it and eat it like that. The following mix is a bit mild. I think it is the hyssop (which I’ve never seen in a store) that gives it the characteristic sharp, burns-the-back-of-your-throat taste.

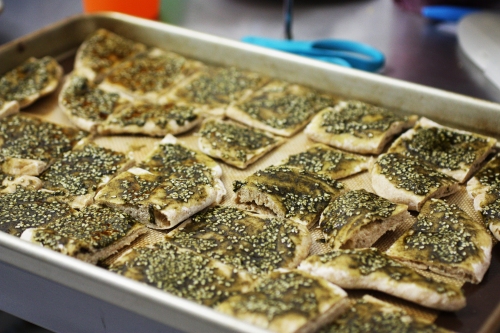
Zahatar chips on a pan

Recipe: Za’atar spice mix

Makes about 3.5 tablespoons – multiply or divide as needed. Store leftovers in an airtight container.

  • 2 tbs dried thyme
  • 1 tbs dried oregano or marjoram
  • 1 tbs ground sumac
  • 1 tsp sesame seeds
  • 1/2 tsp salt

Mix or grind together, and enjoy on anything that tastes good. Mix with oil to paint onto other foods, or use as a dry rub. Heat brings out the aroma, but be careful not to burn it or it may become bitter.

Have you ever had za’atar before? What did you eat it with? What do you think it had in it?

Read Full Post »

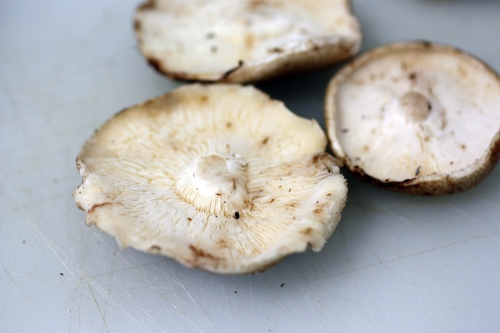
Three shiitake mushroom caps, gills up, on a cutting boardLast year, Jen and I decided to increase the vegetarianism in our diets. We didn’t cut out animal products entirely, but we stopped buying meat and most of our meals were vegetarian or vegan. Among many other reasons for making this change, we really want to shake our cooking up. While we have gone back to eating meat this year, the time we spent without it taught us a lot about what sates our appetites.

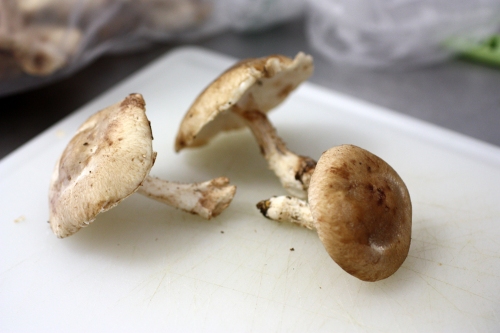
Three fresh shiitake mushrooms, on their sides, on a cutting board

I don’t find meat to be an essential part of a meal, in general. But if you are used to cooking with it regularly, it can be a challenge creating balanced meals without it. That’s probably why so many “meat” substitutes exist. Don’t get me wrong, protein is an important nutritional element, and many touted meat substitutes such as tofu (soy), seitan (made of wheat gluten) or tempeh (another soy product) provide that nutrient in abundance. But I do find that some people (mostly non-vegetarians) get much more worked up over getting enough than the average person really needs to worry about. Grains, legumes, and many vegetables can provide just as much protein when included regularly in a diet.

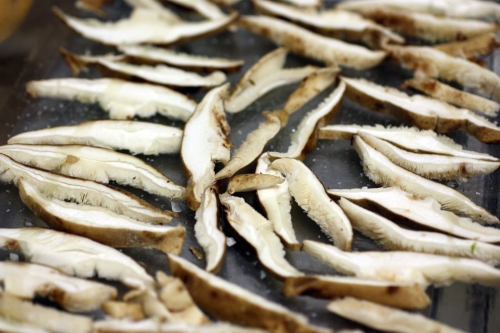
Sliced strips of shiitake mushroom caps on an oiled glass pan

Meat substitutes can be great, and I plan on talking more about them in future weeks. If you’ve read much of this blog, you have probably gathered that I prefer food to be processed as little as possible when I begin cooking with it. So I knew that no matter what we were going to be eating we would be making much of it ourselves. And that points out another problem with relying on most meat substitutes for the bulk of a vegetarian diet – they are often heavily processed and expensive.

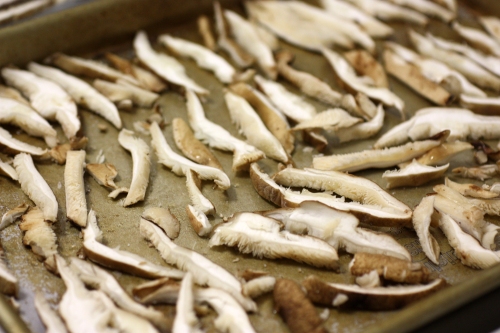
Sliced strips of shiitake mushroom caps on an oiled metal baking sheet

In my new diet, I wanted to focus on fresh food, that I knew as much about as possible, and that would keep me interested and coming back for more. I also had to combat with no longer having some of my favorite foods, which was less about nutrition or cost cutting and more about giving my taste buds what they wanted. After going without bacon for some time, I did begin to crave it quite a bit. That’s when I remembered this recipe that I had come across when following a recipe for seitan bourguignon (also amazing, but we’ll get to that later).

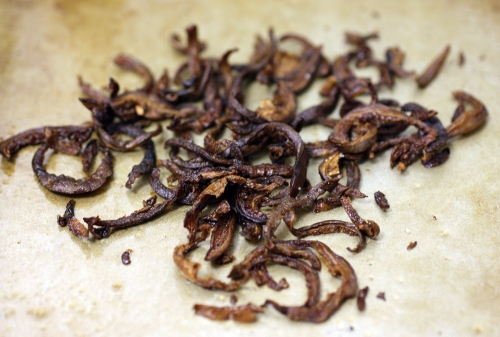
Crispy roasted shiitake mushroom strips on a metal baking sheet

Fresh (undried) shiitake mushrooms are used here, roasted with a bit of oil and salt, until they are crispy. It’s not just the crisping that makes them wonderful – though the texture is quite addictive. The musky, sulfuric flavor of shiitake mushrooms turns into magic when they are cooked. They take on a remarkable similarity to the meaty, salty, umami of bacon. It’s not an exact match, for sure, but it’s so close, I’d wager that someone might be fooled in a blind taste test.

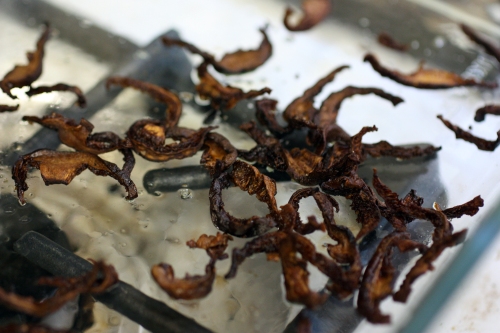
Crispy roasted shiitake mushroom strips on a glass pan

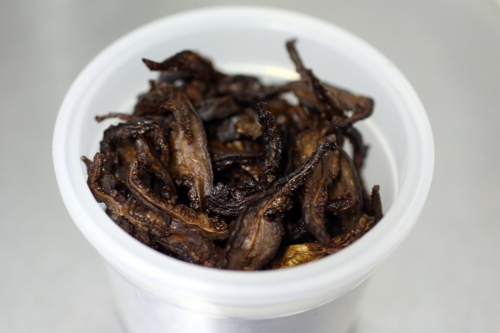
I couldn’t believe how good they turned out, I made them over and over again. This is a recipe any person who avoids bacon, or meat, should have in their repertoire. The only downside is that a pound of mushrooms, once the stems are removed, and the caps are cooked, turn into maybe a cup of crunchies. At the lowest price I’ve found for fresh shiitake, that’s much steeper than the price of even good bacon.

Crispy roasted shiitake mushroom strips in a small round tupperware

Recipe: Roasted Shiitake Bacon

Recipe originally found on WholeLiving.com

  • 1/2 to 1lb fresh shiitake mushroom caps, sliced
  • 1 tbs olive oil
  • light sprinkle of course salt
  1. Preheat oven to 350 degress. 
  2. Spread mushroom slices on an oiled pan. A glass or pyrex pan cooks more slowly, a metal pan cooks more quickly. I found I liked the way they came out better on the glass pan, but they took a lot more time to crisp. 
  3. Allow to roast uncovered, tossing every 10 minutes, until dry, crisp, and not burnt. The first few times you check on them, they may not seem like they will ever become crispy, but have patience. The process can take anywhere from 30 minutes to an hour depending on the amount of mushrooms, and the kind of pan. 
  4. Once removed from the oven, allow to cool. 

Enjoy anywhere you might include bacon. And even more places. Since these were more like crumbles than slices, we put them on salads, wraps, on pizza, in macaroni and cheese, and crunched as a snack. The only place they didn’t really work was as a soup topping, as they became soggy pretty quickly.

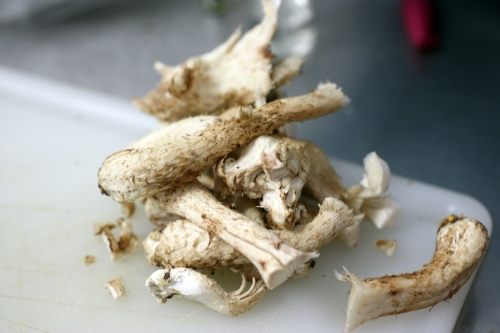
Hey! When you’re chopping up the mushrooms, don’t throw away the stems! They are full of flavor, even if the texture is unpleasant. Clean them off and use them to make a mushroom or vegetable stock. I just save them in a large zip-top bag in the freezer until I have enough to make a large pot.
Shiitake mushroom stems piled on a cutting board

Read Full Post »

New design

After over 3 years of presenting this blog using a mostly out-of-the-box WordPress theme, I finally figured out what I wanted to do instead. Presenting the new Get Cooking design!

GCB new design screenshot

I use my recipes all the time, and I generally look them up on my phone so I can see them in the kitchen. I got really sick of having to zoom in to see the recipe contents, so you’ll notice that now, when viewing the site on a small device, the right column drops to the bottom and the post content fills up the full width of the screen. There’s also a handy “Hop down to the recipe” link on posts with recipes, so you can jump past my rambling and right to the recipe, if you wish.

I hope you enjoy the new design. If you notice anything not working in a way that makes sense, or have any features you would like to see, just let me know.

Read Full Post »

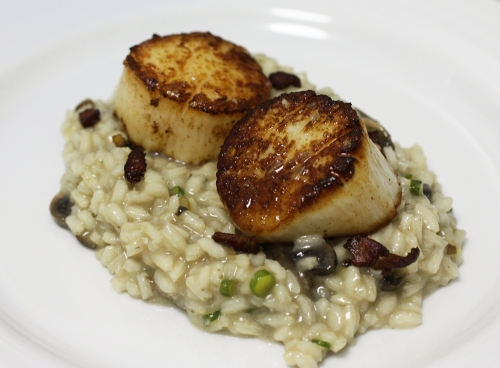
Seared sea scallops over mushroom and garlic scape risotto

Tonight’s dinner was the first in a long time that I’ve actually wanted to share ’round these parts. I needed a good blog break to refocus on what it is I want to share here. (more…)

Read Full Post »