Feeds:
Posts
Comments

Posts Tagged ‘vegan’

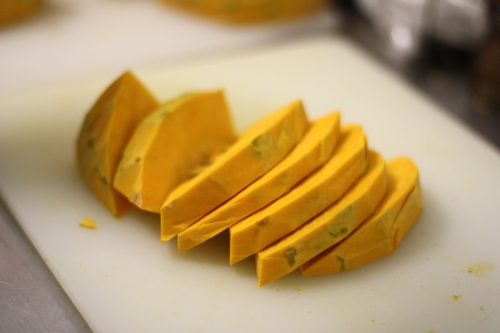
Kabocha squash slices on a cutting board

A perfect way to get some extra fall flavor into a simple warming pasta dish. I know a lot of people who don’t like winter squash very much. I blame this on the fact that most winter squash (think pumpkin, or any squash with meaty orange flesh) is served sweet with pie flavorings like nutmeg and cinnamon. I was pretty ambivalent about pumpkin in anything other than pie before I learned how to use it too. Some pairings I’ve found that work well with winter squashes are rosemary, ginger, bacon (as an aromatic).

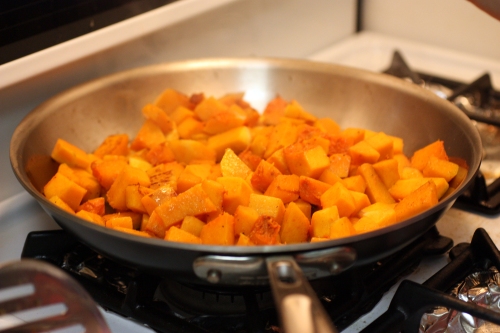
Cubes of squash cooking in a pan

But these flavors rely on the squash to take center stage. If you’re still not sure about squash (or you’re feeding someone who isn’t), you can use it to give body and just a mild flavor to a tomato sauce, and complement it with bit of chili or cayenne pepper. In this recipe, I use butternut squash, because I find it one of the most flavorful and easy to break down. Any winter squash would probably work well here. Kabocha slices are pictured above, and cubes of butternut squash are visible in the second image.

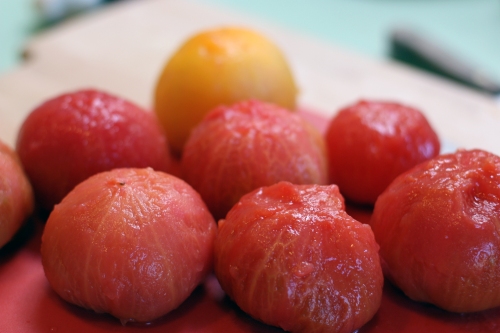
Peeled heirloom tomatoes

This is my go to sauce. It helps me use up any squash I have laying around the house, and makes a regular pasta/sauce night a bit more exciting and nutritious. It makes a great cheesy non-dairy dish.

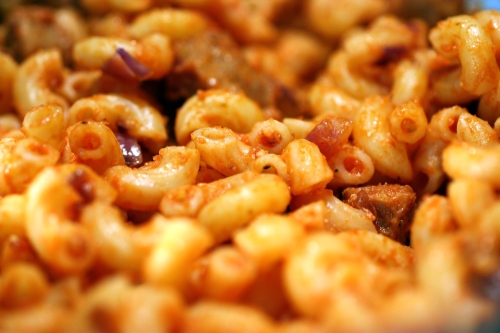
This sauce sticks so nicely to a textured pasta

Recipe: Tomato-Squash sauce

Makes 6-8 servings

  • 1 1/2 lbs fresh tomatoes or can of crushed tomatoes
  • 1 1/2 cup raw butternut squash, chopped (or 1 cup cooked and pureed)
  • 1 red onion, chopped fine
  • 3 cloves of garlic, minced
  • 1/2 tsp cayenne pepper
  • 1 tbsp olive oil
  • 1/2 cup of water, vegetable or chicken broth
  • salt and pepper to taste
  1. If using fresh tomatoes, cut an X onto the bottom of each tomato and then blanch in a pot of boiling water for 30 seconds (less if they are small, more if they are very large). Then, shock them in an ice water bath or under a cold water rinse, before trying to peel. Remove the skins. Slice the tomatoes in half and scoop out the seeds. Feel free to chop the tomatoes into smaller pieces for the sauce if you do not plan on pureeing. 
  2. Add oil to a saucepan and bring to low heat. If using raw squash, add the cubes to the pot, and saute until they begin to soften. Stir frequently When you can poke through pieces easily with a fork, you can move on to the next step.
  3. Add the tomatoes (and all juices), onions, garlic, and cayenne. Allow the mixture to stew for 10 minutes uncovered, stirring occasionally so nothing sticks to the bottom. If the mixture is dry, add about 1/2 cup of water, vegetable stock, or chicken broth to give the vegetables a place to dissolve. 
  4. If you are not planning on pureeing, you can stir or mash until the squash dissolves. Otherwise, now is when you will want to puree the mixture. Add salt and pepper and taste. 
  5. If the sauce is too thin for pasta, allow to reduce until it reaches the thickness you prefer. If it is too thick, add more water/broth until it reaches the consistency of pasta sauce. 
  6. Mix pasta of your choice into the sauce, or pour the sauce over the pasta. Enjoy! 
Sometimes I add a bit of browned spicy Italian sausage crumbles to the mix to give it an extra kick, but it is just as wonderful without the meat. 

Read Full Post »

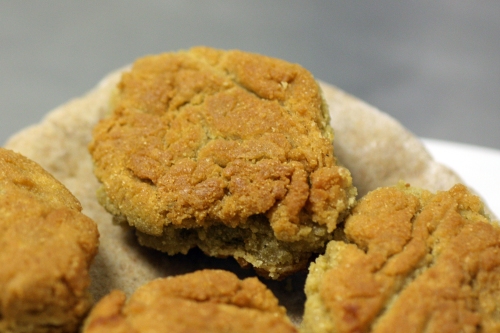
Plate of chickpea nuggets on top of a pita

Last year when we were exploring vegetarian proteins, we started getting all kinds of high protein flours. The most versatile and relatively cheap flour I found was chickpea flour. The first thing I tried to make with it was falafel, using the recipe on the package. We enjoyed them in pita with tahini sauce and lettuce and tomato. They were wonderful, though not the same as the crispy balls of falafel that one sees more often, made of mashed chickpeas. They were very easy to make, just mix some flour and various spices and water, scoop into a pan and cook. Perfect for a weeknight dinner.

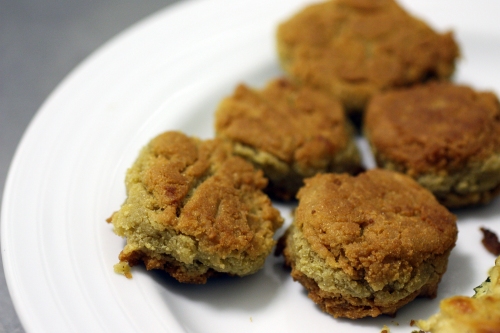
Plate of cooked chickpea nuggets

The flour was also useful in helping to bind various experimental gluten-free veggie burgers.

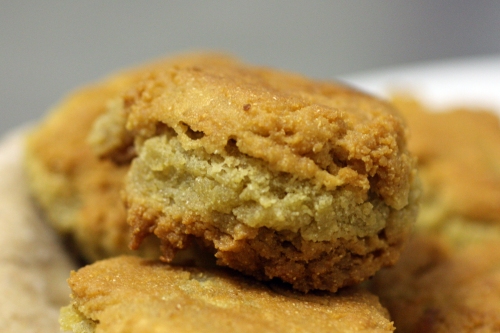
Chickpea nugget from the sideBut I kept coming back to that falafel recipe. It occurred to me, almost immediately, that if they didn’t have Israeli spices, the texture matched that of chicken nuggets remarkably well. I took the falafel recipe, made a few adjustments, and served them with honey mustard instead. Voila, a reasonable substitute for chicken nuggets that are easy to whip up at a moment’s notice.
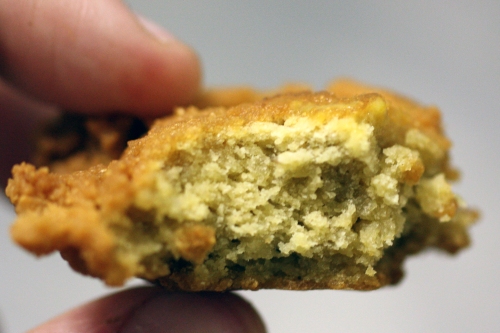
Chickpea nugget with a bite so the inside texture shows

Recipe: Chick(pea) Nuggets

Adapted from Bob’s Red Mill Falafel Patty recipe

Makes 10-14 nuggets

  • 1 1/4 cup of chickpea flour (also called garbanzo bean flour)
  • 1/4 tsp baking soda
  • 1 tsp garlic power or granules
  • 1/2 tsp salt
  • 2 tsp lemon juice
  • 1 tsp olive oil
  • 1/2 cup hot water
  • a few shakes of black pepper
  1. Mix together all of the above ingredients in a medium sized mixing bowl to form a thick pasty batter. Allow to rest for a few minutes while you prepare the pan to fry them in. 
  2. Heat a flat skillet with a few tablespoons of oil for frying. I use regular olive oil. I recommend a non-stick type of pan, as these do try to leave a film of flour behind unless you use a lot of oil. Prepare a plate with a paper towel to drain the nuggets as you remove them.
  3. Spoon tablespoons of batter into the hot pan and press down with the back of the spoon. When one side is crisp and a darker shade of golden brown, flip and cook on the other side. I usually fry them in batches, even with a large pan, so that they have space to brown nicely. 
  4. Remove fully cooked nuggets to paper towel and allow to drain. 

Enjoy warm for the best texture, though they are fine cooled and reheated in the microwave as well. Dip in honey mustard (mixture of yellow mustard, honey and a bit of mayonnaise) or whatever sauce you enjoy with your chicken nuggets. I can’t imagine any child who loves nuggets wouldn’t enjoy these. Try it and let me know!

Read Full Post »

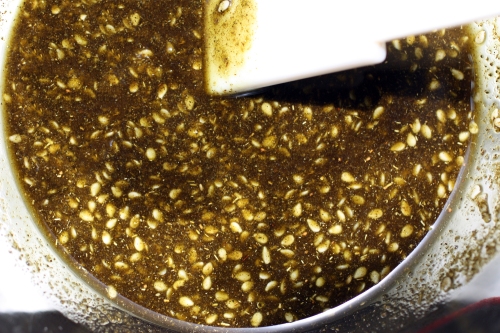
Bowl of zahatar spice and olive oil mixture

Za’atar is a Middle Eastern spice blend. I can’t even describe how to pronounce it because I don’t really know what the right way is myself. Growing up, it was this mysterious mixture we put on top of pita and microwaved, sometimes with mozzarrella cheese on top as well, wafting this strong unique scent throughout the house. It wasn’t until I tasted that familiar flavor in a dipping oil at the upper west side restaurant Vareli (where they also crust a pork chop with it) that I even thought to bring it into my adult life.

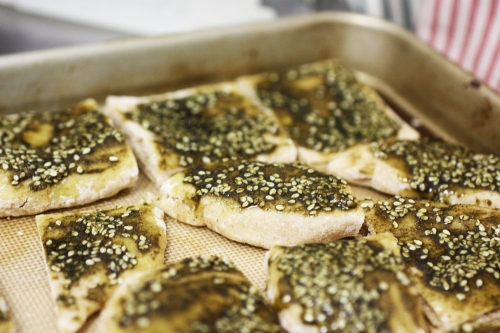
Zahatar on pita, before toasting

I never really gave much thought to what it was made of when I was younger. It was just za’atar. But once I tasted it outside of a family context, I just had to figure it out. Many spice stores sell something called za’atar, but pretty much every blend of it is unique. It seems every Middle Eastern locale, or even every household has their own exact proportion of flavors that make up za’atar. Generally, they can include ground thyme, oregano, marjoram, hyssop, sumac, and whole sesame seeds. The more sumac there is, the redder the mixture will be. I grew up with a dark green kind, but I’ve also seen it in a pistachio color that most likely had no sumac at all.

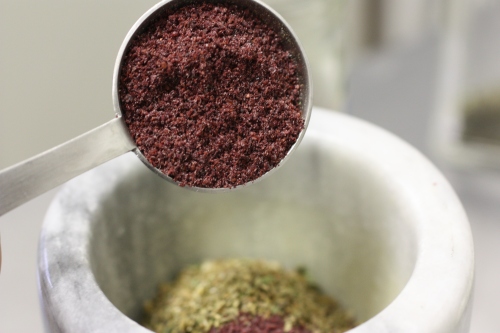
One tablespoon of ground sumac

Every variety is delicious as far as I’m concerned. To make za’atar pita, you simply mix the spice mix with olive oil and salt to taste (I like it to be rather salty), and paint it on top of a pita, or pita wedges. Thin it with oil as much or as little as you like. Some people even just mix the spice with salt and dip soft bits of bread into it and eat it like that. The following mix is a bit mild. I think it is the hyssop (which I’ve never seen in a store) that gives it the characteristic sharp, burns-the-back-of-your-throat taste.

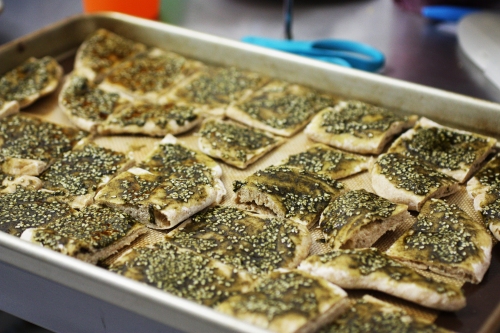
Zahatar chips on a pan

Recipe: Za’atar spice mix

Makes about 3.5 tablespoons – multiply or divide as needed. Store leftovers in an airtight container.

  • 2 tbs dried thyme
  • 1 tbs dried oregano or marjoram
  • 1 tbs ground sumac
  • 1 tsp sesame seeds
  • 1/2 tsp salt

Mix or grind together, and enjoy on anything that tastes good. Mix with oil to paint onto other foods, or use as a dry rub. Heat brings out the aroma, but be careful not to burn it or it may become bitter.

Have you ever had za’atar before? What did you eat it with? What do you think it had in it?

Read Full Post »

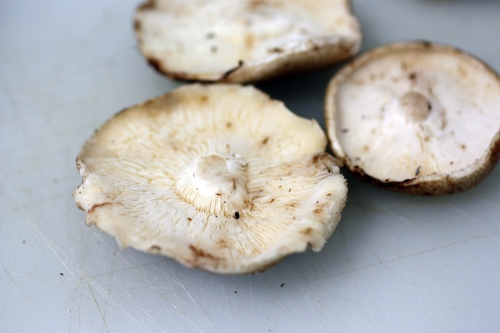
Three shiitake mushroom caps, gills up, on a cutting boardLast year, Jen and I decided to increase the vegetarianism in our diets. We didn’t cut out animal products entirely, but we stopped buying meat and most of our meals were vegetarian or vegan. Among many other reasons for making this change, we really want to shake our cooking up. While we have gone back to eating meat this year, the time we spent without it taught us a lot about what sates our appetites.

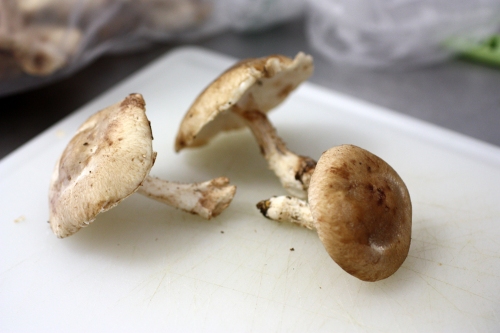
Three fresh shiitake mushrooms, on their sides, on a cutting board

I don’t find meat to be an essential part of a meal, in general. But if you are used to cooking with it regularly, it can be a challenge creating balanced meals without it. That’s probably why so many “meat” substitutes exist. Don’t get me wrong, protein is an important nutritional element, and many touted meat substitutes such as tofu (soy), seitan (made of wheat gluten) or tempeh (another soy product) provide that nutrient in abundance. But I do find that some people (mostly non-vegetarians) get much more worked up over getting enough than the average person really needs to worry about. Grains, legumes, and many vegetables can provide just as much protein when included regularly in a diet.

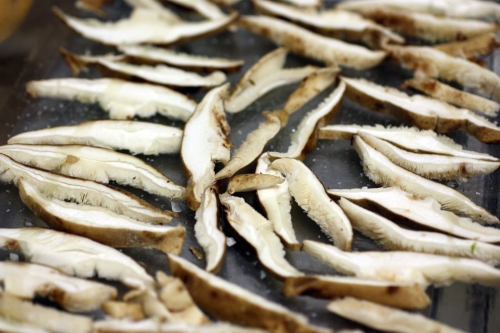
Sliced strips of shiitake mushroom caps on an oiled glass pan

Meat substitutes can be great, and I plan on talking more about them in future weeks. If you’ve read much of this blog, you have probably gathered that I prefer food to be processed as little as possible when I begin cooking with it. So I knew that no matter what we were going to be eating we would be making much of it ourselves. And that points out another problem with relying on most meat substitutes for the bulk of a vegetarian diet – they are often heavily processed and expensive.

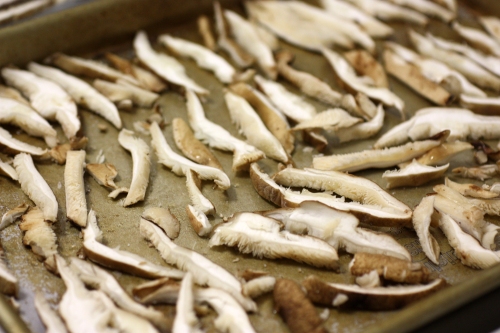
Sliced strips of shiitake mushroom caps on an oiled metal baking sheet

In my new diet, I wanted to focus on fresh food, that I knew as much about as possible, and that would keep me interested and coming back for more. I also had to combat with no longer having some of my favorite foods, which was less about nutrition or cost cutting and more about giving my taste buds what they wanted. After going without bacon for some time, I did begin to crave it quite a bit. That’s when I remembered this recipe that I had come across when following a recipe for seitan bourguignon (also amazing, but we’ll get to that later).

Crispy roasted shiitake mushroom strips on a metal baking sheet

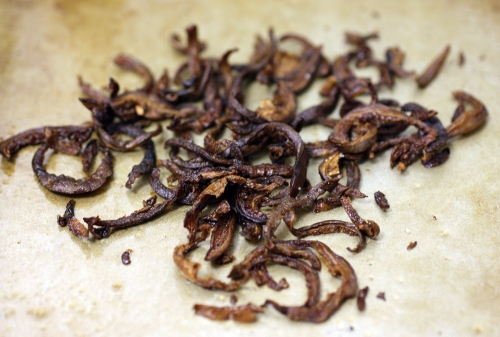
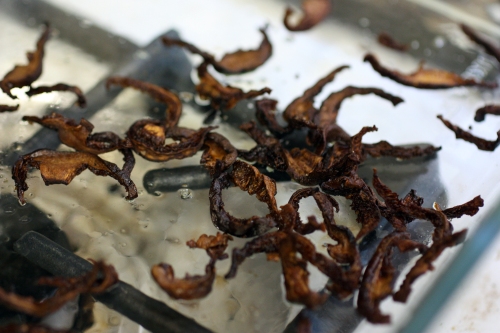
Fresh (undried) shiitake mushrooms are used here, roasted with a bit of oil and salt, until they are crispy. It’s not just the crisping that makes them wonderful – though the texture is quite addictive. The musky, sulfuric flavor of shiitake mushrooms turns into magic when they are cooked. They take on a remarkable similarity to the meaty, salty, umami of bacon. It’s not an exact match, for sure, but it’s so close, I’d wager that someone might be fooled in a blind taste test.

Crispy roasted shiitake mushroom strips on a glass pan

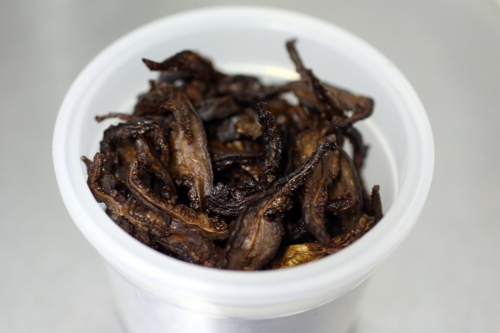
I couldn’t believe how good they turned out, I made them over and over again. This is a recipe any person who avoids bacon, or meat, should have in their repertoire. The only downside is that a pound of mushrooms, once the stems are removed, and the caps are cooked, turn into maybe a cup of crunchies. At the lowest price I’ve found for fresh shiitake, that’s much steeper than the price of even good bacon.

Crispy roasted shiitake mushroom strips in a small round tupperware

Recipe: Roasted Shiitake Bacon

Recipe originally found on WholeLiving.com

  • 1/2 to 1lb fresh shiitake mushroom caps, sliced
  • 1 tbs olive oil
  • light sprinkle of course salt
  1. Preheat oven to 350 degress. 
  2. Spread mushroom slices on an oiled pan. A glass or pyrex pan cooks more slowly, a metal pan cooks more quickly. I found I liked the way they came out better on the glass pan, but they took a lot more time to crisp. 
  3. Allow to roast uncovered, tossing every 10 minutes, until dry, crisp, and not burnt. The first few times you check on them, they may not seem like they will ever become crispy, but have patience. The process can take anywhere from 30 minutes to an hour depending on the amount of mushrooms, and the kind of pan. 
  4. Once removed from the oven, allow to cool. 

Enjoy anywhere you might include bacon. And even more places. Since these were more like crumbles than slices, we put them on salads, wraps, on pizza, in macaroni and cheese, and crunched as a snack. The only place they didn’t really work was as a soup topping, as they became soggy pretty quickly.

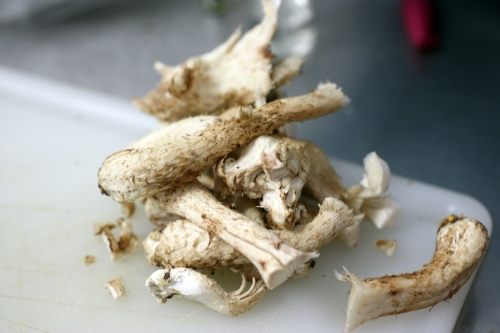
Hey! When you’re chopping up the mushrooms, don’t throw away the stems! They are full of flavor, even if the texture is unpleasant. Clean them off and use them to make a mushroom or vegetable stock. I just save them in a large zip-top bag in the freezer until I have enough to make a large pot.
Shiitake mushroom stems piled on a cutting board

Read Full Post »

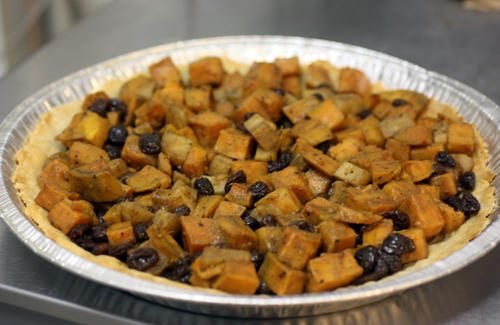
Curried Yam Tart

A few Thanksgivings ago, Jen and her mom went to the store to get a can of pumpkin for the pumpkin pie. They got home and realized that they had grabbed a can of sweet potatoes instead. Back to the store once more for an exchange, and back home again. The pie was made. And then eaten. And then the second can of sweet potatoes that was accidentally brought home was thrown away before anyone could see.

That’s the problem with so many sweet potato pies – they look like pumpkin pies, but aren’t them. When you are looking forward to pumpkin pie and you get sweet potato, it’s really disappointing. And sweet potato pie shouldn’t be disappointing, or indistinguishable. It should be delicious and unique.

I thought it would make more sense to have sweet potatoes as a side instead of competing with pumpkin pie as a dessert. Cubed instead of pureed. Savory and curried instead of sugared. A pie unlike any pumpkin pie I’ve ever seen. (more…)

Read Full Post »

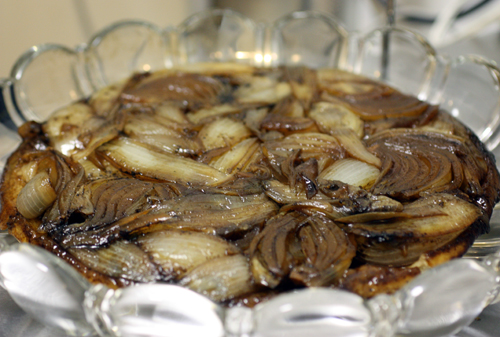
Onion Tart Tatin

We’re finally done with the dessert pies! As good as those all were, savory pies are one of my latest obsessions. Making a savory pie can be just as easy as making a sweet pie, but for some reason we don’t always think of them. We should, however, because savory pies are a great way to feed and impress a lot of people at once. Think about it: you pick a filling, execute, and then all of the sudden you have a gorgeous meal that can feed eight people, give or take. This pie is a perfect example of one of those impressive, but actually pretty easy pies. And for all its looks, it was a pretty inexpensive pie to make as well, since the filling was mostly made up of onions.

Serve this as a side to any meal. This is great for potlucks, since it is not likely to be duplicated by other guests. Those who prefer not to eat meat, dairy, or eggs will be relieved to have a complex dish on the table that is not just another pasta salad.  (more…)

Read Full Post »

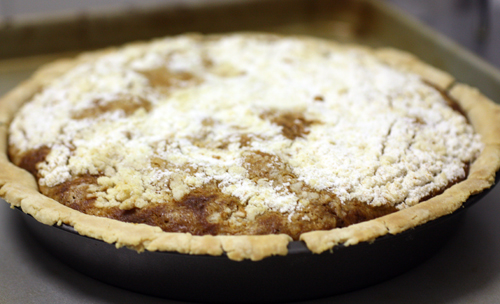
Shoofly Pie

“Shoo fly, don’t bother me!” I have to sing this little song to myself every time I think of shoofly pie. Most people I know are not familiar with shoofly pie, and I don’t even when I first heard of it. Shoofly pie is a cakey molasses pie that seems to come together from nothing.

Last year, I had the sudden urge make this pie to use a bottle of molasses I had had in my cabinet for a while. The recipe is actually a very easy one, but it was hard for me to imagine what it was supposed to  look like or what it would taste like. I used blackstrap molasses, which is one of the strongest tasting varieties. The pie came out looking almost like dark fudge. I loved it, though I don’t know that everyone I shared it with felt the same way – love of molasses is acquired and this kind was particularly bitter. Vanilla ice cream on top helped even it out, but at the time I didn’t think I would make it again.

I wanted to have something different to offer at the pie parade, so I decided to pull this one out again. This time I made it using a lighter molasses. The pie looked completely different and came out fluffy, not too sweet but not too bitter. To my surprise, this shoofly pie was the favorite on the dessert table, even though many of the people who tasted it were not big fans of molasses. I will definitely be making this pie again – it’s too easy and good not to. (more…)

Read Full Post »

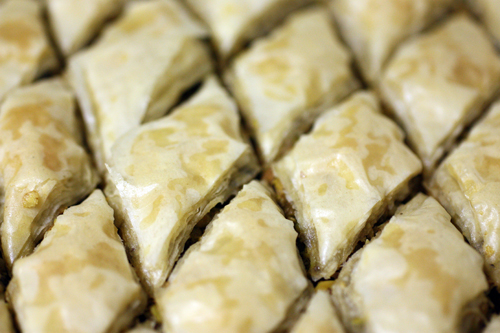
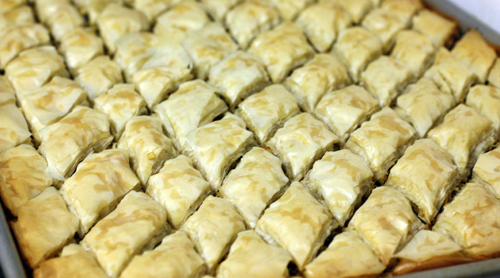
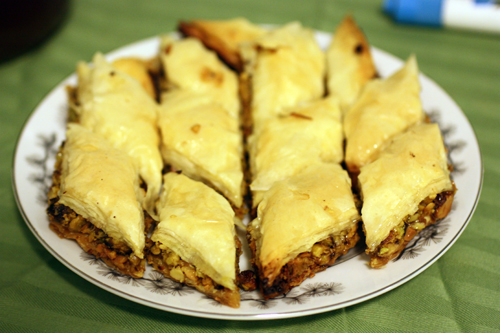
Baklava, Syrian-style

**So it’s not a pie in the usual sense, but baklava is pastry stuffed with nuts, sweet syrup, and butter. The pie spirit is there. And really, who would complain about getting baklava?**

Growing up I never knew that there was more than one kind of baklava. The sticky, crispy, little diamonds with pistachio and that hint of rose water were the only ones I knew. Later, I found out that baklava comes in countless shapes and sizes, with different fillings and sweeteners. Every culture that makes it (think Mediterranean) makes it differently. Heck, every family probably makes it differently.

Baklava baked to a golden crisp

A few years ago, I happened upon a Turkish bakery on the East side of Manhattan that offered about a dozen varieties: baklava filled with pistachios, walnuts, even sour cherries and other dried fruits. Some were shaped like squares, others like small round nests, and still others rolled up like cigars. Jen and I bought two pieces of each to take home and slowly devoured them. They were absolutely delicious, crunchy and sticky sweet, but not the baklava I remembered from childhood.

Baklava glistening with syrup

If you think you don’t like baklava, please try these. The honey flavor that most people associate with what could be a too-sweet dessert is replaced by a lite simple syrup flavored with rose water. When you make them yourself, you can control how much syrup is used, so they don’t have to be too sweet if you don’t want them to be. When I make them, I probably use two-thirds to three-quarters of the syrup most people use. Just enough to flavor the pastry without completely saturating it. This way, they are the perfect complement to a heavy meal., and no one can eat just one. (more…)

Read Full Post »

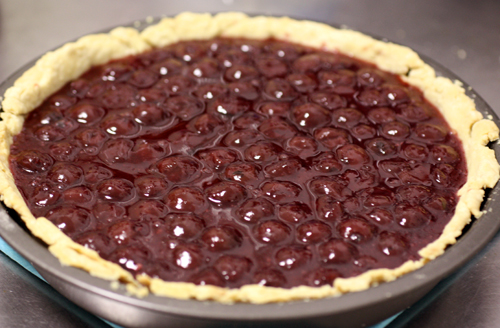
Sour Cherry Pie
Sour cherries aren’t really in season this time of year, but they can often be found jarred. They lose their characteristic bright red coloring when they are jarred (I believe the bright red “cherry pie filling” that you can find cans of has added coloring to make them look as they do when they are freshly picked). Instead, these have a darker purple coloring, which I associate with the fall and winter. These cherries are preserved in a very light sugar syrup, so they retain their natural tartness without taking on too much extra sweetness.

The tartness of the sour cherries and the lack of a top crust keeps this pie very light tasting, compared with some of the other pies I’ve posted so far. With the depth of flavor this pie packs, you’d be surprised that it is so easy to make. It’s a bit more complicated to make with fresh unpitted cherries, but we’d have to save that excursion for summer anyway.

I was worried about this pie filling having too much spread when cut, so I used some tapioca-based gelatin to make it a bit firmer. I don’t think it was entirely necessary, but it is an option if you want the filling to hold up more on its own.


(more…)

Read Full Post »

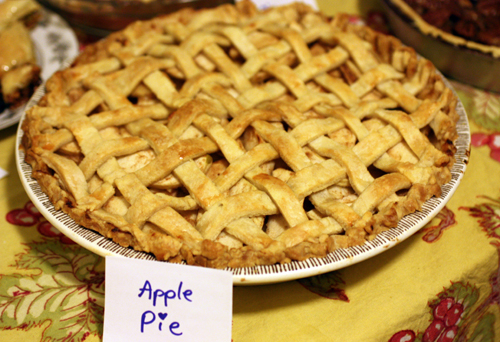
Apple Pie

I’m very particular about my apple pie. I used to think that I didn’t like it, but it turned out that I didn’t like how soupy and sweet many apple pies can be. Then I found the joy of baking specifically with apples that could stand up to the heat and retain some firmness. To help the apples hold up, we use a lot of lemon juice and not a lot of sugar. The apples come out tender with full apple flavor, that is enhanced by the other ingredients and not hidden by them. This is an apple pie that can be eaten at any time of day, warm with ice cream or whipped cream, or cold on its own. Have it for breakfast! (more…)

Read Full Post »

Older Posts »